
Pragmata Walkthrough: Sector 1 (Solar Power Plant)
Need help wrapping your head around Pragmata’s Prologue and Sector 1? The beginning of Pragmata introduces you to intrepid space man Hugh Williams as he investigates a huge 3D printing facility on the moon that’s powered by Lunafilament, a miracle substance capable of printing just about anything. It’s here that a nasty accident will hit the rest of Hugh’s crew, forcing him to ally with none other than a cute little Pragmata robot he names Diana.
This first stretch of Pragmata is fairly straightforward, but you’ll still need to wrap your head around the game’s novel take on hacking, as well as all of the neat abilities that Hugh and Diana have at their disposal as they explore the Cradle, which has been taken over by IDUS, an AI that’s grown a little too smart for its own good. This guide provides a full walkthrough for the Pragmata Prologue as well as Sector 1, the Solar Power Plant, helping you learn key mechanics and find collectibles.
Keep in mind that major spoilers follow!
In this guide:
Prologue
Once you can control Hugh, follow your teammates and practice moving around in your nifty spacesuit. You’ll undertake some light platforming via your Thrusters, which let you hover briefly in the air after doing a jump, and as you progress further into the Cradle, you’ll spot signs of a mess. Obviously, something fishy’s going on.
After the team summons a robot called a Walker to help clear some wreckage, disaster strikes in the form of a moonquake. Hugh’s crew exits the picture, and he’s saved from near death by a bubbly blonde tot in a puffy blue jacket. Although an official introduction won’t occur until a little later, this is D-I-03367, also known as Diana. Before the pair can get acquainted, IDUS sics a Walker on them.

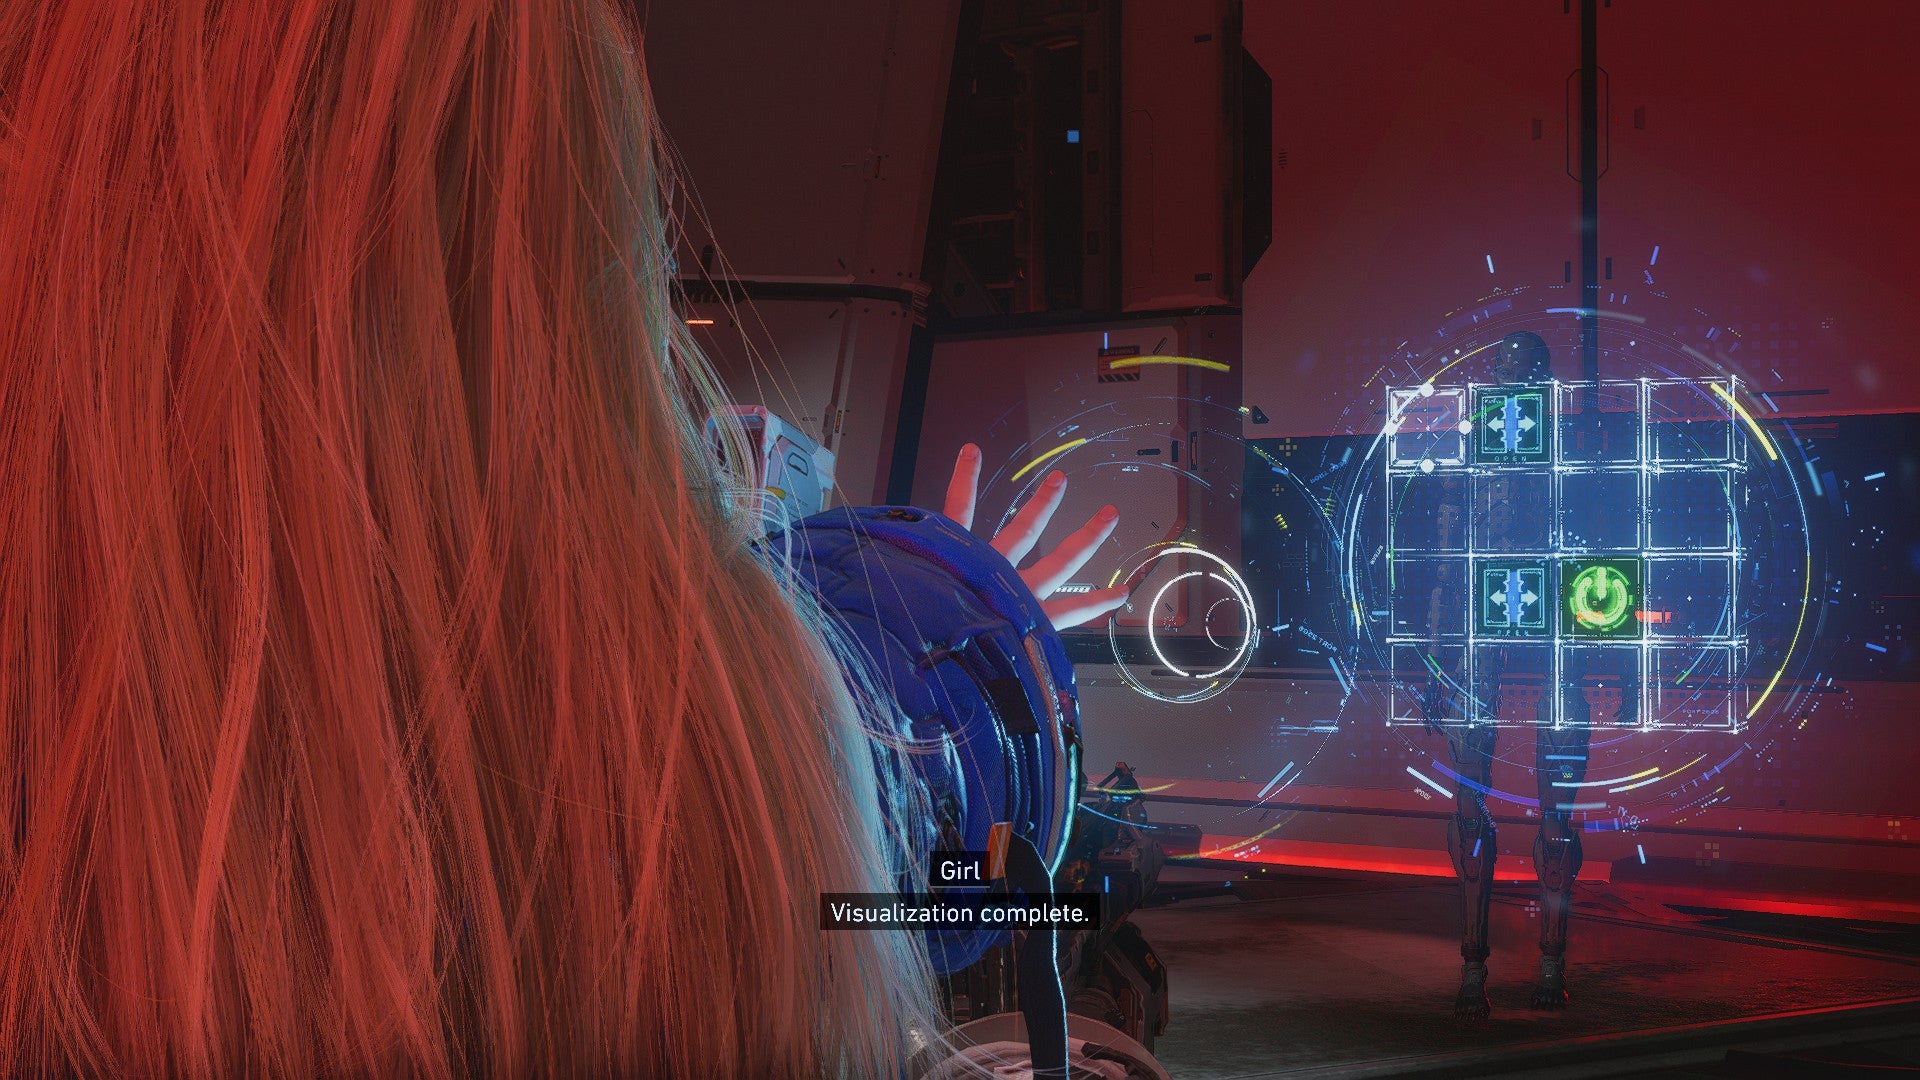
This is your chance to practice hacking enemies in Pragmata. Basically, Hugh’s gun is too weak to destroy bots on its own, but with Diana’s capabilities, you can hack enemies to make them more susceptible to shots. Think of each hacking segment as a little puzzle minigame where you’ve got to move the cursor across the matrix and connect it with the green square (called the EXE node). Damage increases as you move across blue squares, and once you hit the EXE node, enemies will receive the OPEN status and take full gunfire. Hacking gets more complicated as the game goes on, so get acquainted with it now!
After defeating the Walker, collect the glowing Lunafilaments that it drops. Then go up to the next door and use Diana to rotate its control panel circuits by pressing the labelled button before the timer runs out. In the next room, grab the Repair Cartridge — these are Hugh’s main method of healing, but use them wisely, as you’ll only ever have a limited quantity at your disposal.
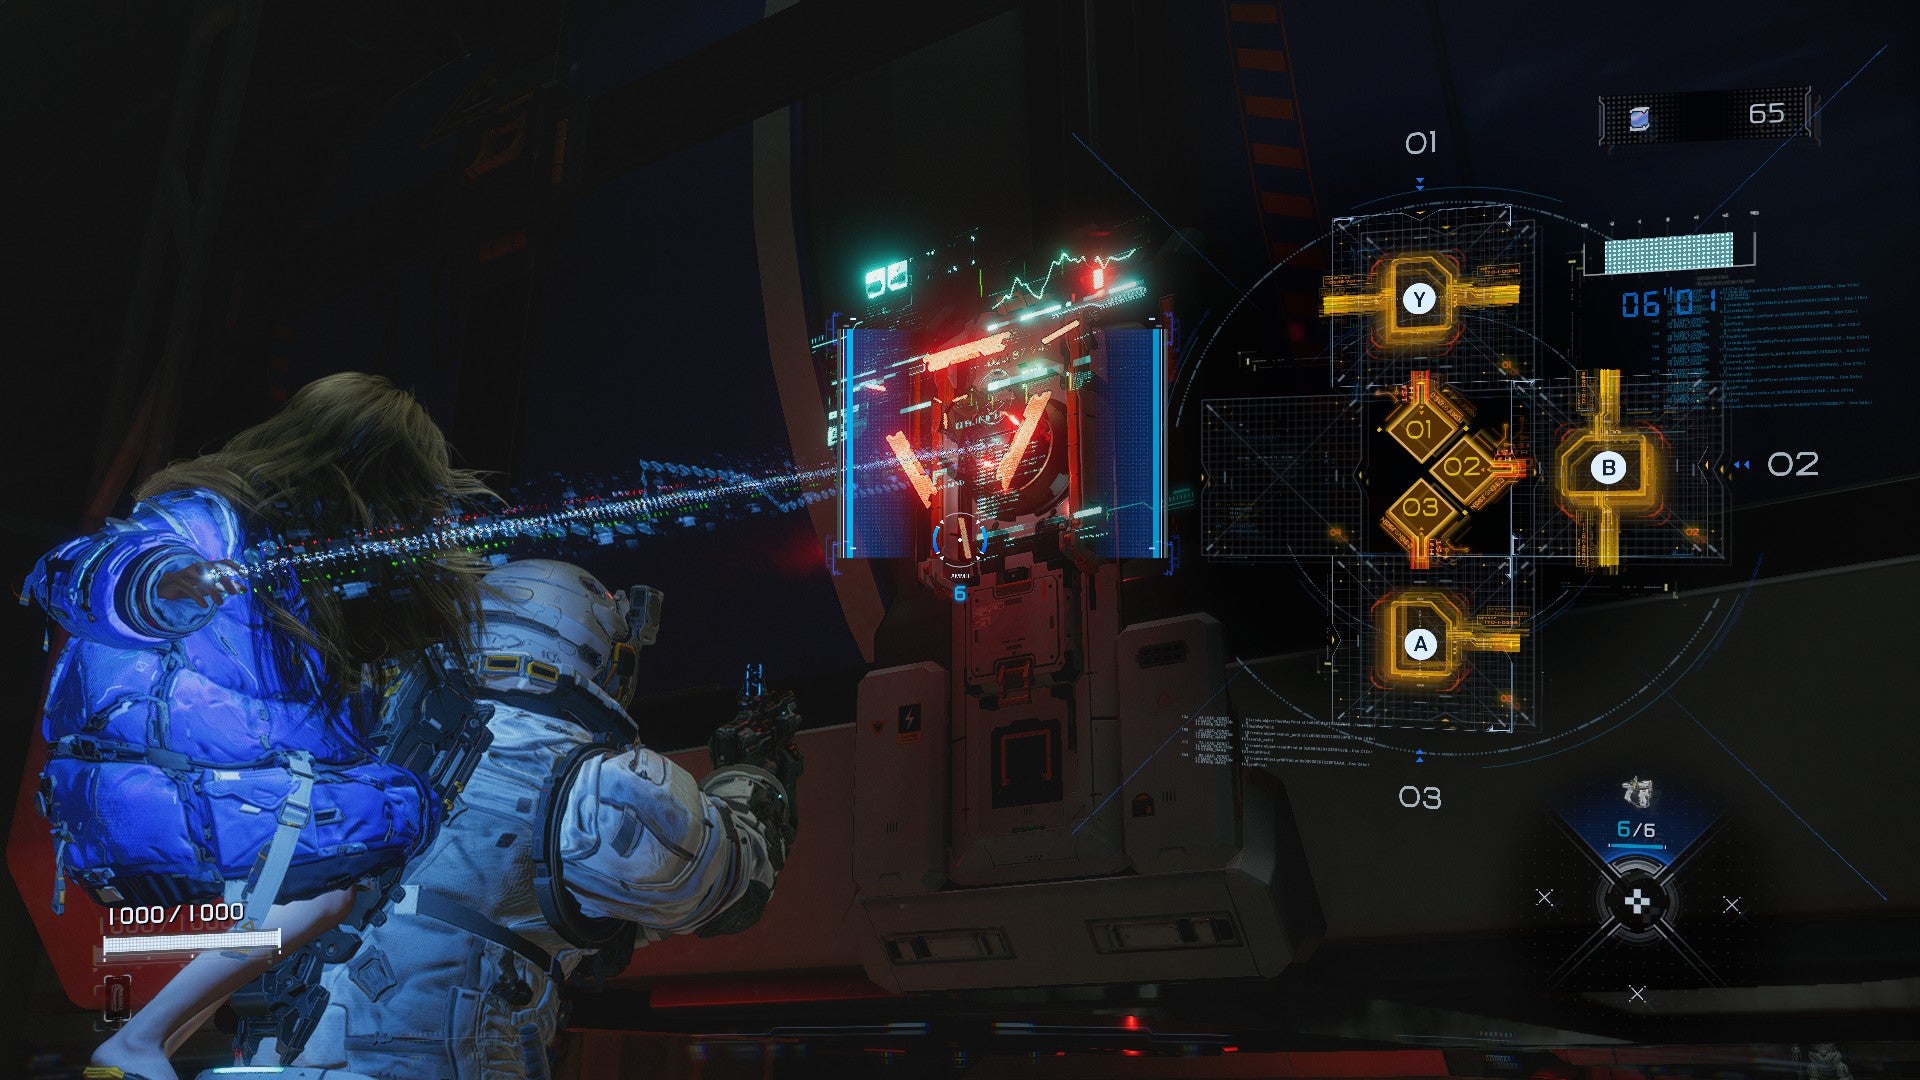
Afershocks of the moon quake hit in the following room, and you’ll need to navigate Hugh over some platforms to reach the Tram, the main method of moving around in the Cradle. Walkers abound, and you’ll get the chance to practice dodging and thrusting to avoid enemy attacks. You’ll also notice that hacking circuits becomes somewhat more complex here — instead of pressing a single button, you’ll need to press up to three buttons in the right order.
The Shelter
Hugh might grumble that he’s “getting carried by a little bot kid,” but Diana proves invaluable as she helps her new sad dad make it to the Shelter, Pragmata’s central hub. It’s here that you’ll improve your equipment, unlock collectibles, and hang out between missions. Take note that the Shelter is currently Level 0. Obviously, this place is gonna level up alongside our heroes and soon become a real swanky spot.
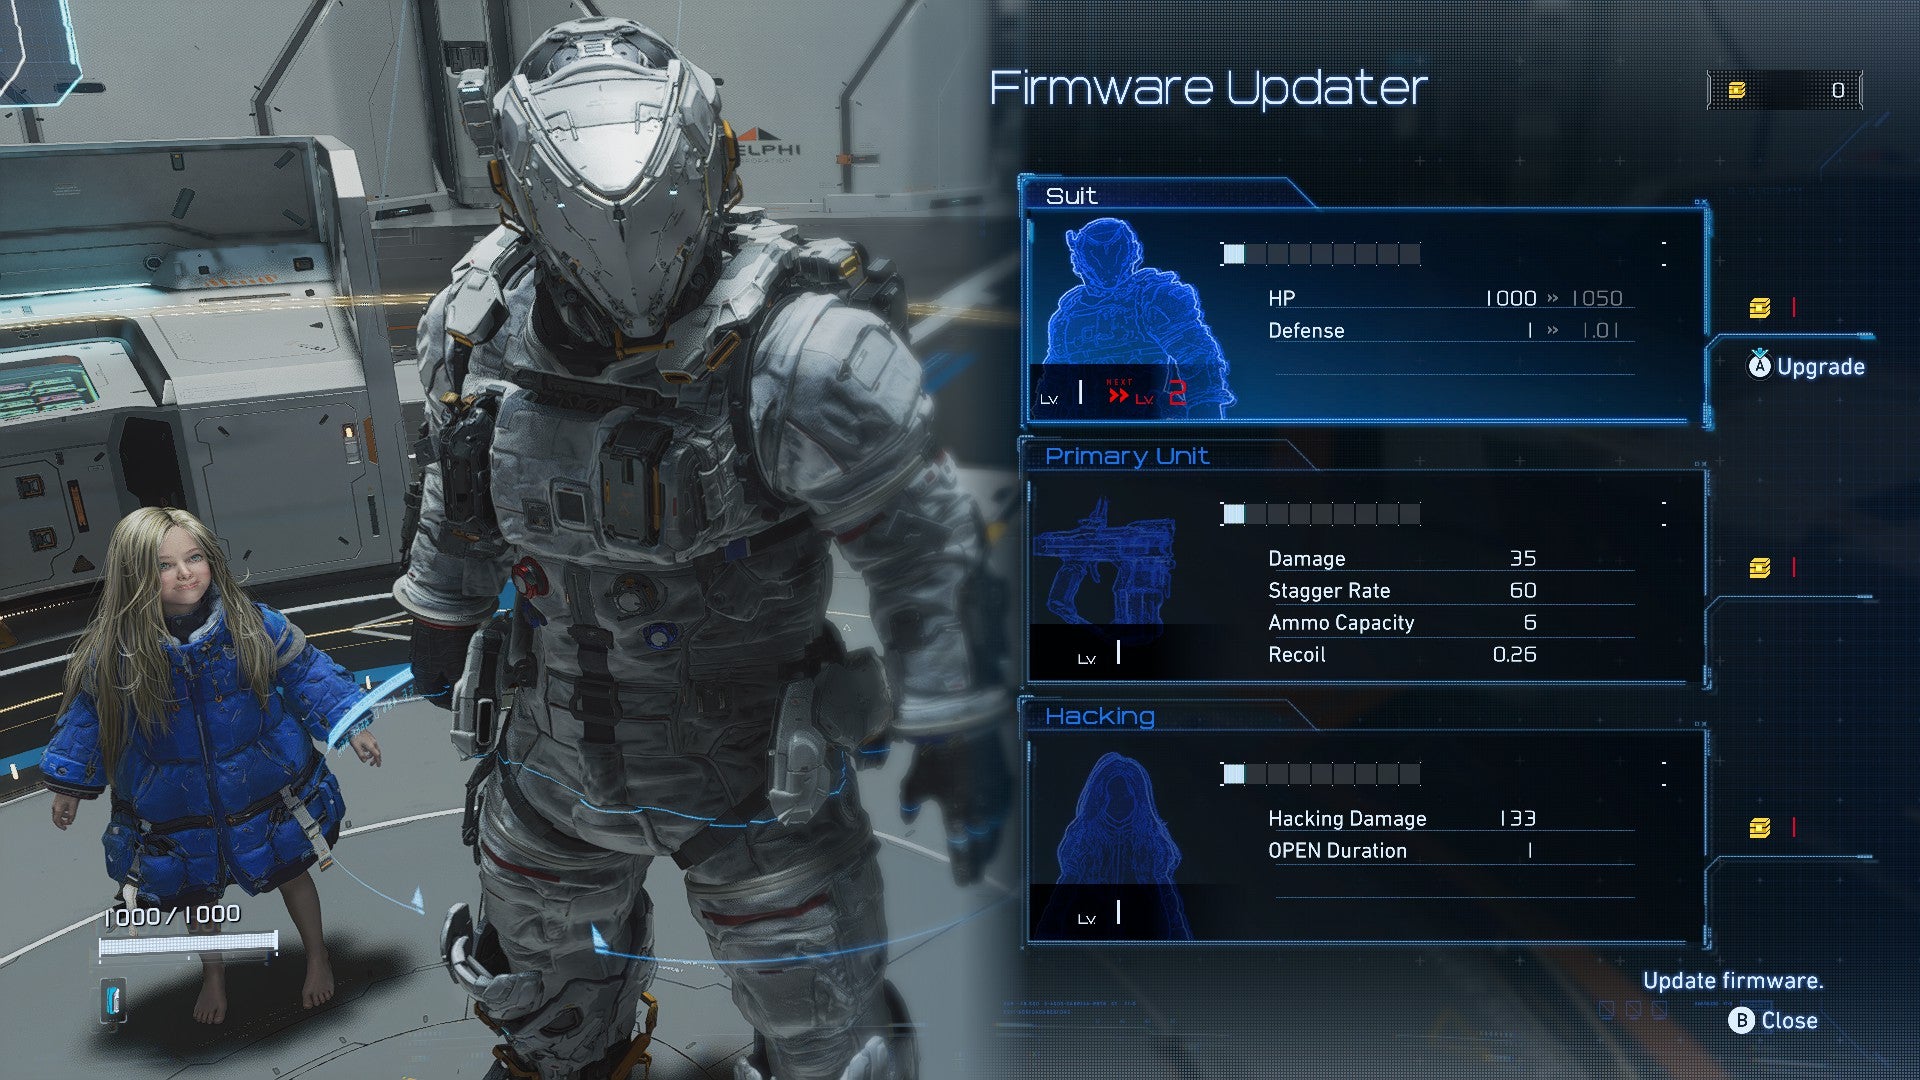
There’s not much else you can do in the Shelter at the moment, but you can upgrade your gear by heading to the central computer consoles. The Firmware Updater lets Hugh improve his suit durability, the power of his primary gun, and Diana’s hacking prowess via Upgrade Components. These orange-yellow chips are usually hidden in off-the-beaten-path areas or given as rewards after major fights, so keep an eye out for them.
Meanwhile, the Unit Printer lets you use Lunafilament to print weapons, hacking mods, and attachments for Hugh’s gear. There’s little here at the moment, but once you start finding guns and other goodies in the wild, you can return here to print them and make ‘em a permanent part of your arsenal.
That’s all you can do in the Shelter for now. When you’re ready, take the Tram to Sector 1: Solar Power Plant. Notice that before you board, you can customise Hugh’s loadout — obviously, this will become an important step once you have more equipment to juggle.
Generator Entrance
A note before we begin — Pragmata’s Sectors contains a multitude of collectible items, many of which will not be immediately accessible. While it’s not required to finish the game, if you want to collect everything, it’s best to run through previously-visited Sectors once you’ve upgraded your Firmware and gotten more abilities.
This walkthrough will describe the most succinct and easiest way to progress through a Sector, but finding every single item contained within will require thorough exploration and backtracking.
After getting off the Tram, you’ll be tasked with a new objective — restore power to the lunar base. Check out the computer screen in front of you to learn that the main power generator’s on the top floor, then head immediately left to grab an Upgrade Component. Keep exploring until you encounter a big screen that reads EMERGENCY MODE; you’ll unlock a prompt describing Diana’s Scan ability shortly afterwards, which lets her analyse the surrounding environment and mark objectives with icons. (Kinda like Detective Mode in the Batman Arkham games, except it doesn’t show you enemies through walls.
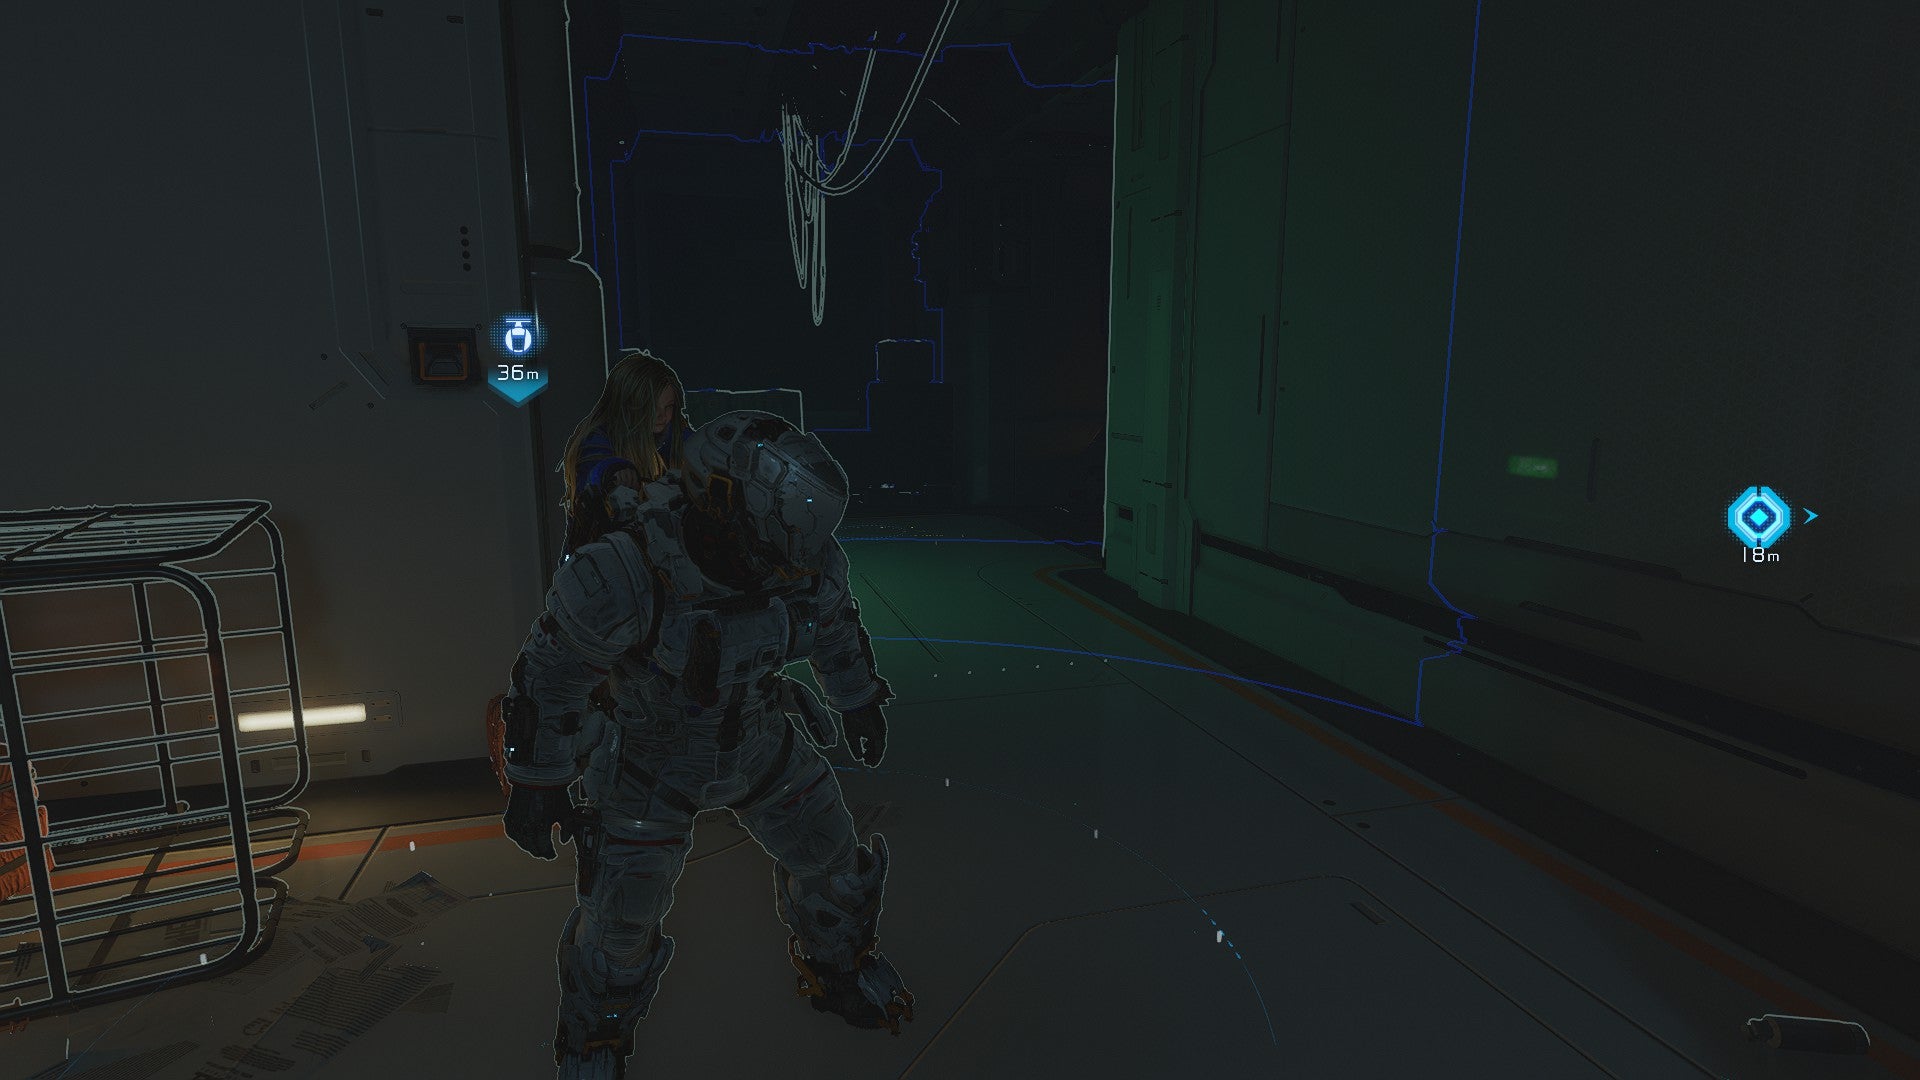
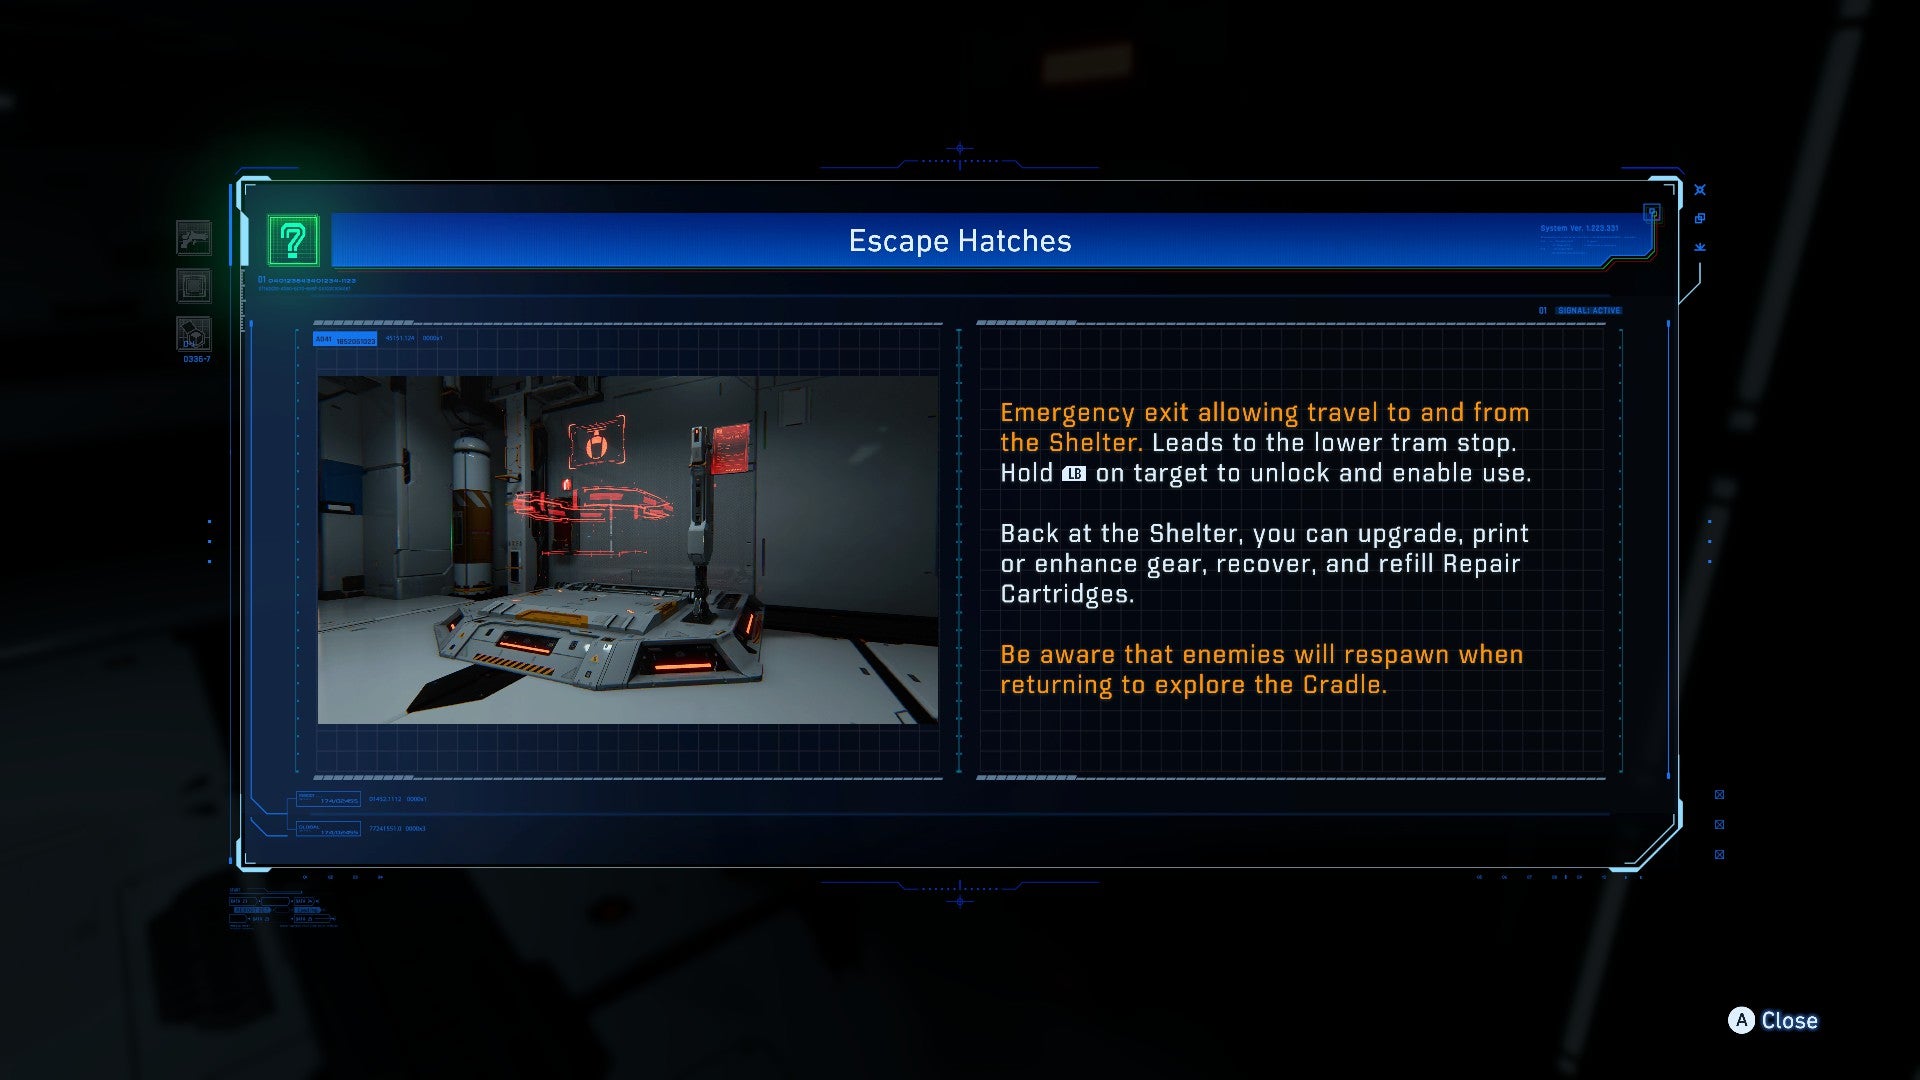
If you try Scan now, you’ll see two markers — one that’s slightly more prominent and blue (probably about 18m or so away, and a farther one that resembles a little pod (probably about 36m away). The prominent marker always shows the path to your immediate objective. Meanwhile, the other marker shows the nearest Escape Hatch shortcut back to the Shelter — more on this later when we unlock it.
Follow the objective marker to pick up some emails about lockdown procedures, another hackable circuit, and a Walker to blast apart. You’ll turn the lights back on, but you’ve still gotta make it to the top floor. Continue following Diana’s Scan marker as it leads you past some lasers on the ground. Use the Midair Dodge to jump over them.
If you retrace your steps back through the previously-dark hallways you traversed, you’ll spot a door marked “Sec .06” that you can hack; inside, you can witness the first of many holographic discussions that can be unlocked throughout the Cradle. (The transcripts from these are viewable in the Holos section of the main menu’s Archive.)
You can also open a box that contains a Data Shard. These power-ups help increase Diana’s Overdrive Protocol, the gauge in the lower left section of the screen that also slowly fills by completing hacks. When the Overdrive Protocol is full, Diana can unleash a potent attack that blasts and immobilises all bots in the near vicinity.
Following this, explore the outside room that faces the screen displaying the logo for Babel Industries. Defeat the Walkers here and explore the room with the shining blue turnstile-like barriers to unlock the Power Plant Platform Station Escape Hatch — the shortcut back to the Shelter that we previously mentioned.
Explore the nearby hallways to encounter your first Watcher, a flying robot foe who’s easy to hack but possesses annoying targeting capabilities. There’s a door here with two red circles on it that are locked — hack the control panel next to the door to open one of the circles, and explore the nearby room to find an Upgrade Component and the second control panel that opens the other circle.
Enter the door to make it to a factory area where you’ll face an onslaught of Watchers and Walkers. Smash ‘em and keep progressing to find the Sealed Sector Gate Station Escape Hatch. Return to the Shelter if you want; if not, the next door leads to an area full of lasers coming from above and below. Put Hugh’s jumps and thrusters to good use, avoiding them while being sure to grab the Upgrade Component on the ground.
Hacking the Power Terminals
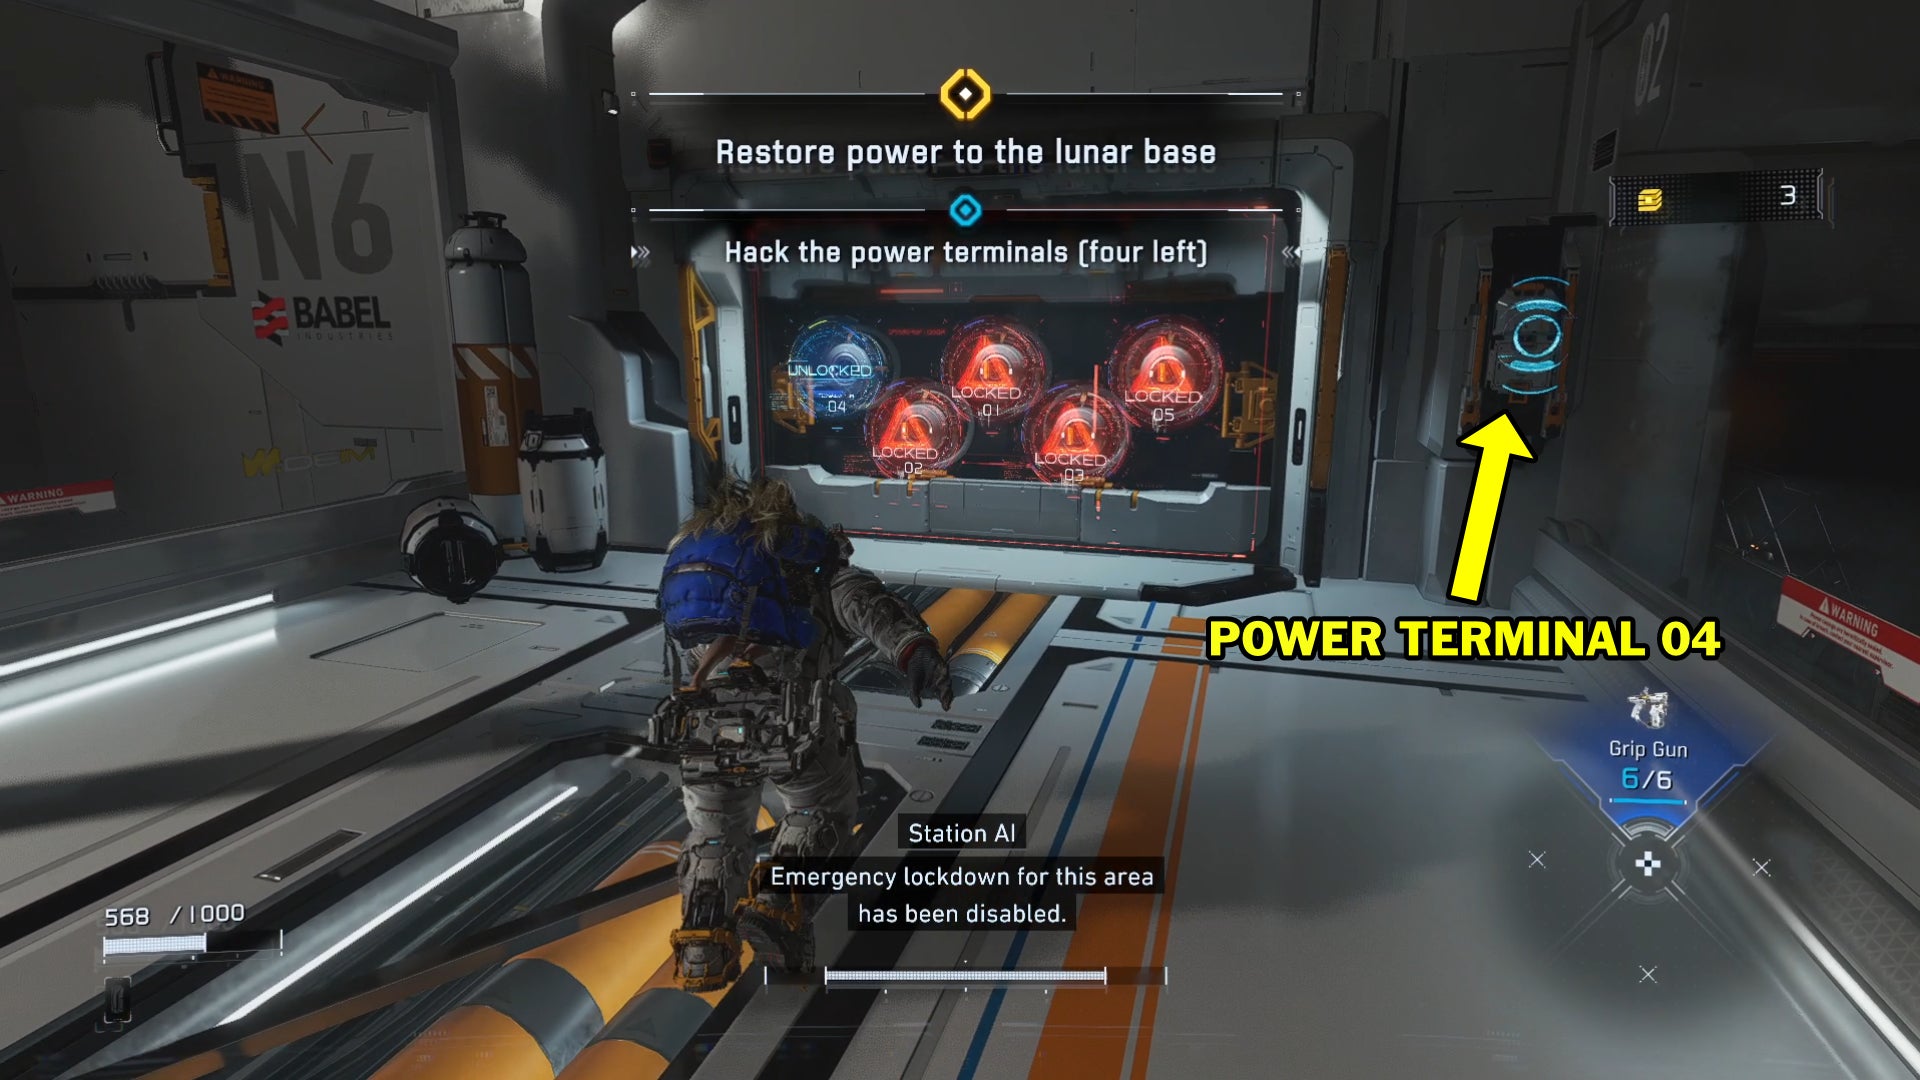
Your next goal will be to hack your way through a whopping five power terminals before you can open the locked door in front of you. (Pragmata has a lot of these “hack XXX number of things to progress” puzzles, so get used to ‘em now.) Luckily, each terminal is numbered on screen. Unlocking Power Terminal 04 is the easiest; just hack the control panel to the right of the door itself.
To get to the next terminal, hop down, grab the Shockwave Gun (a new and excellent weapon that you should print back at the Shelter whenever possible), and test it against the enemies who appear.
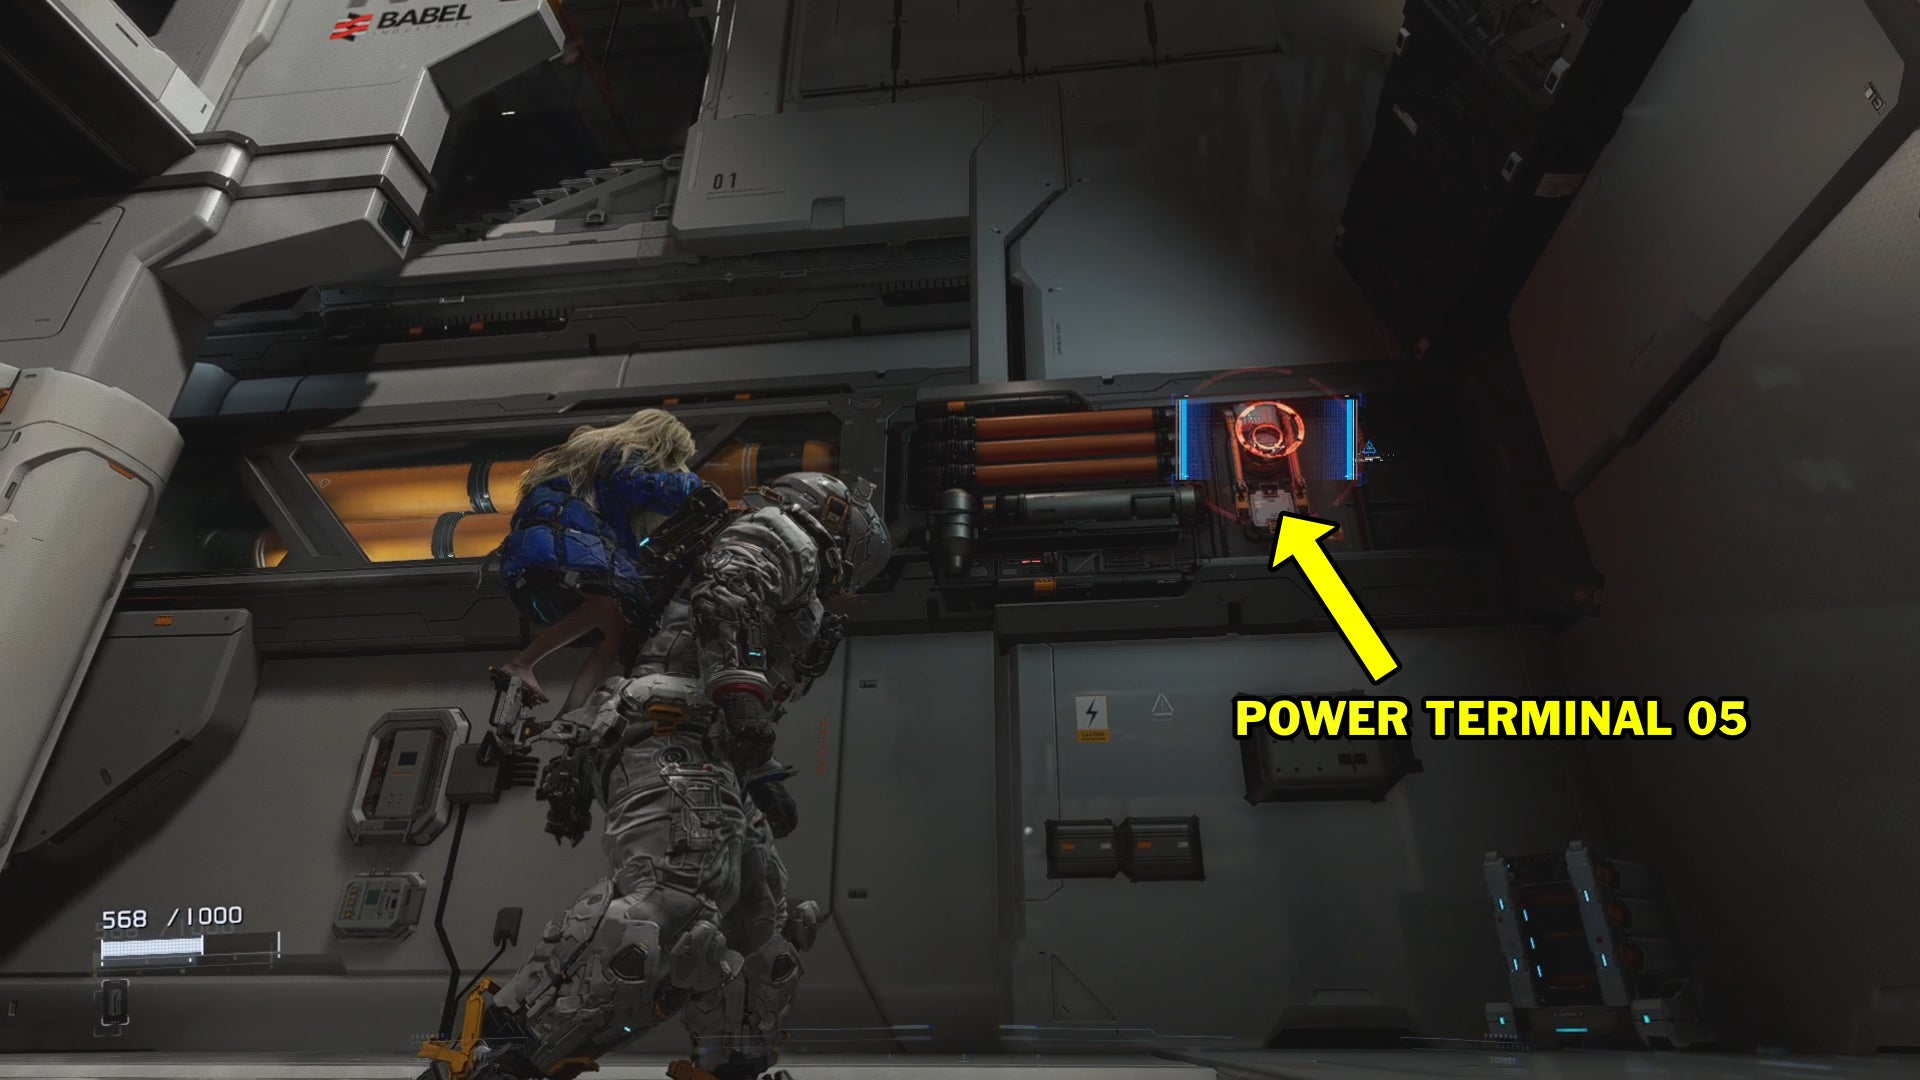
There’s a new breed of automaton here — a tough round bastard named the Crusher that takes more hits than any other bot you’ve faced thus far. Use the Shockwave Gun to wear it down to size, and aim for the head. After defeating the Crusher, look above on the walls to spot the control panel for Power Terminal 05.
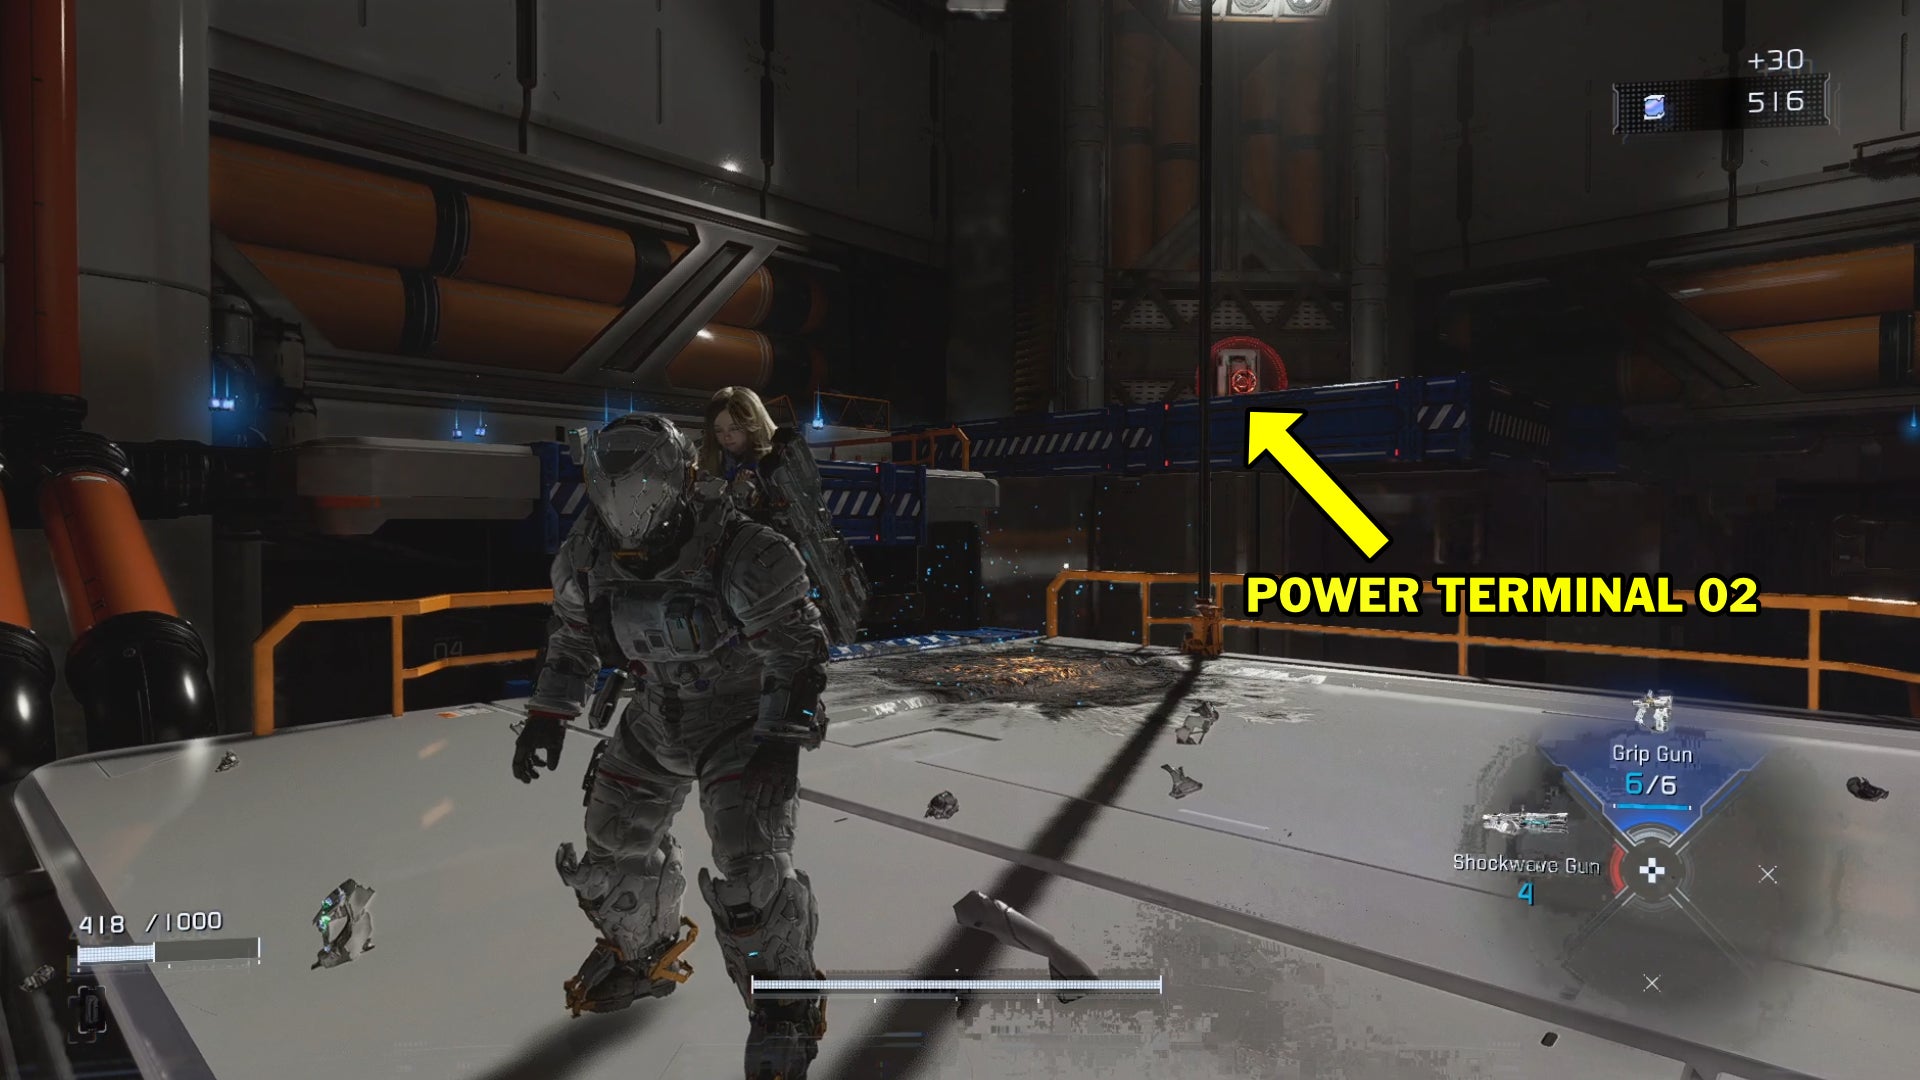
Two down, three to go. Ride the lift back up and continue following your Scan objective marker over the platforms, which requires some light jumping while facing off against multiple bots. From the highest platform vantage point, turn right to activate Power Terminal 02.
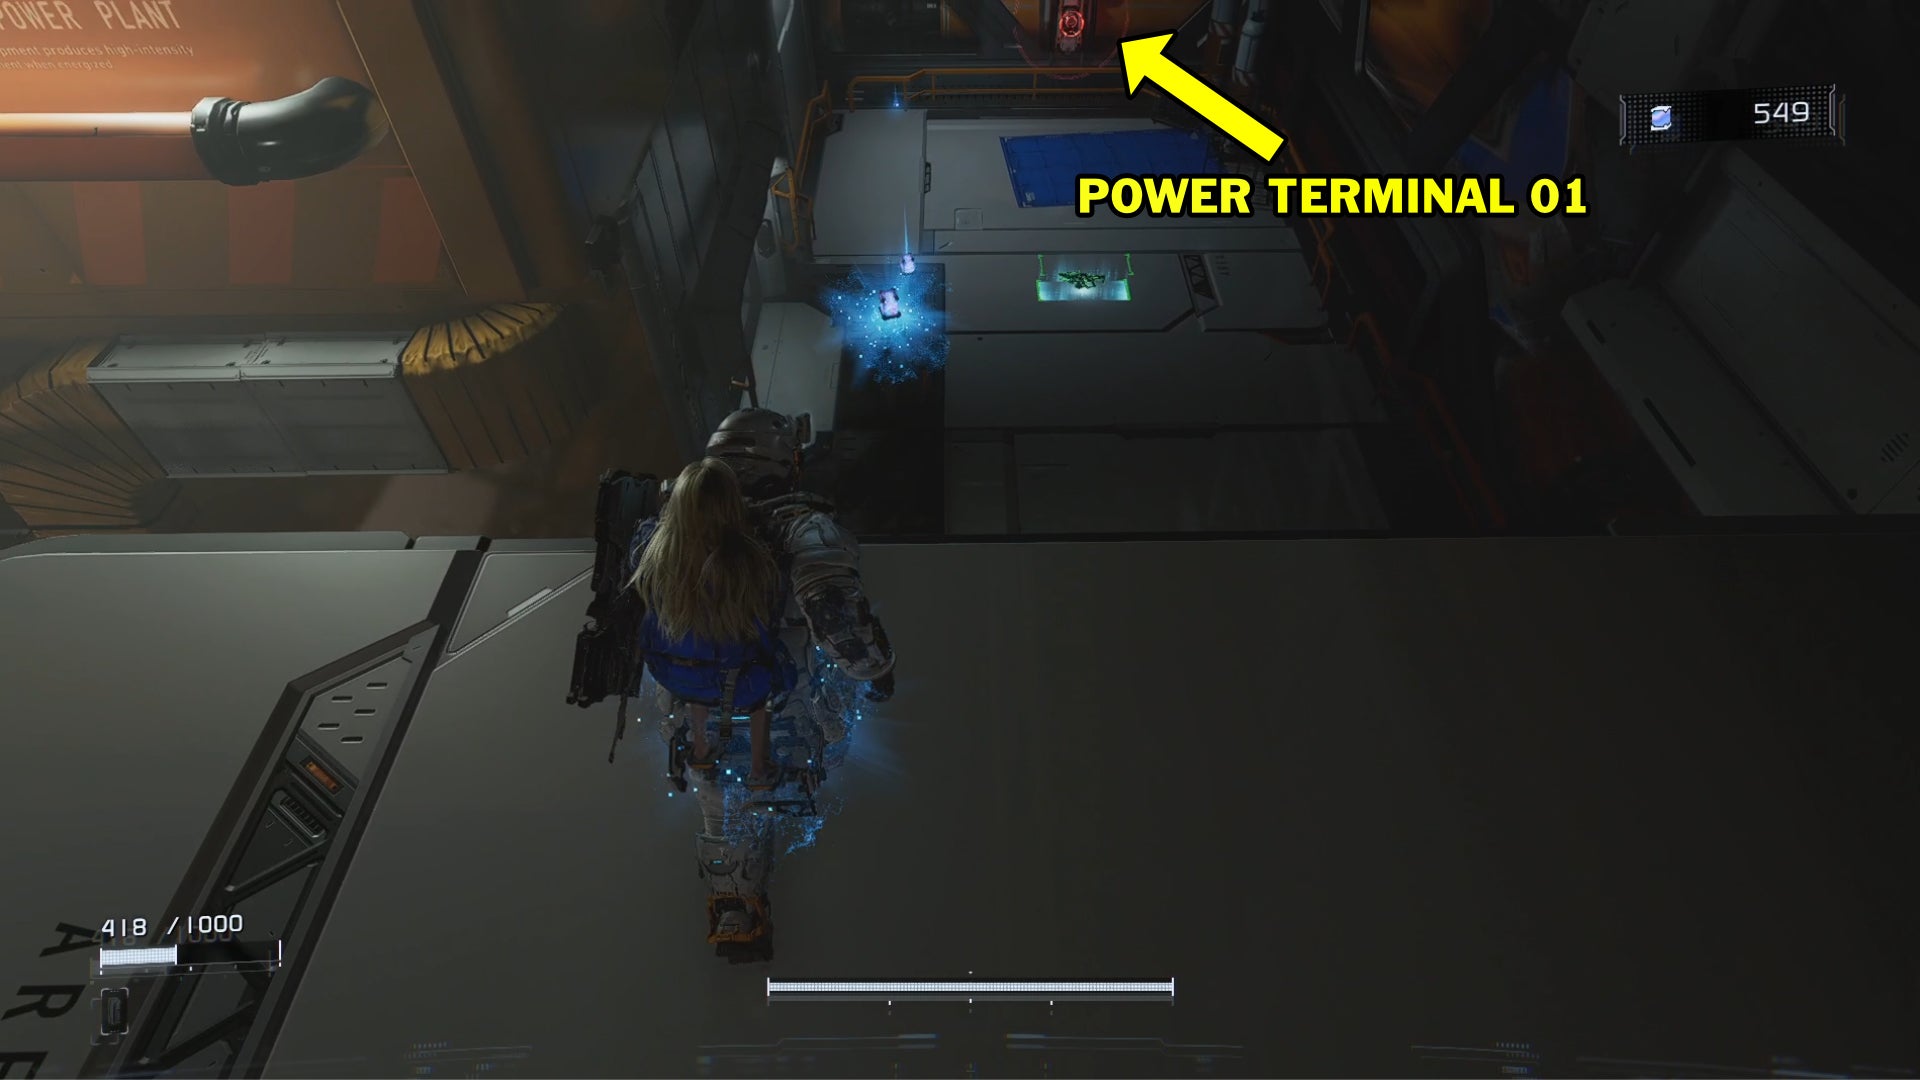
Then veer left; jump across the platforms following the Lunafilament trail, and you’ll see Power Terminal 01 below you next to what appears to be a green gun (this is a Stasis Net that lets you shoot energy nets that immobilise enemies).
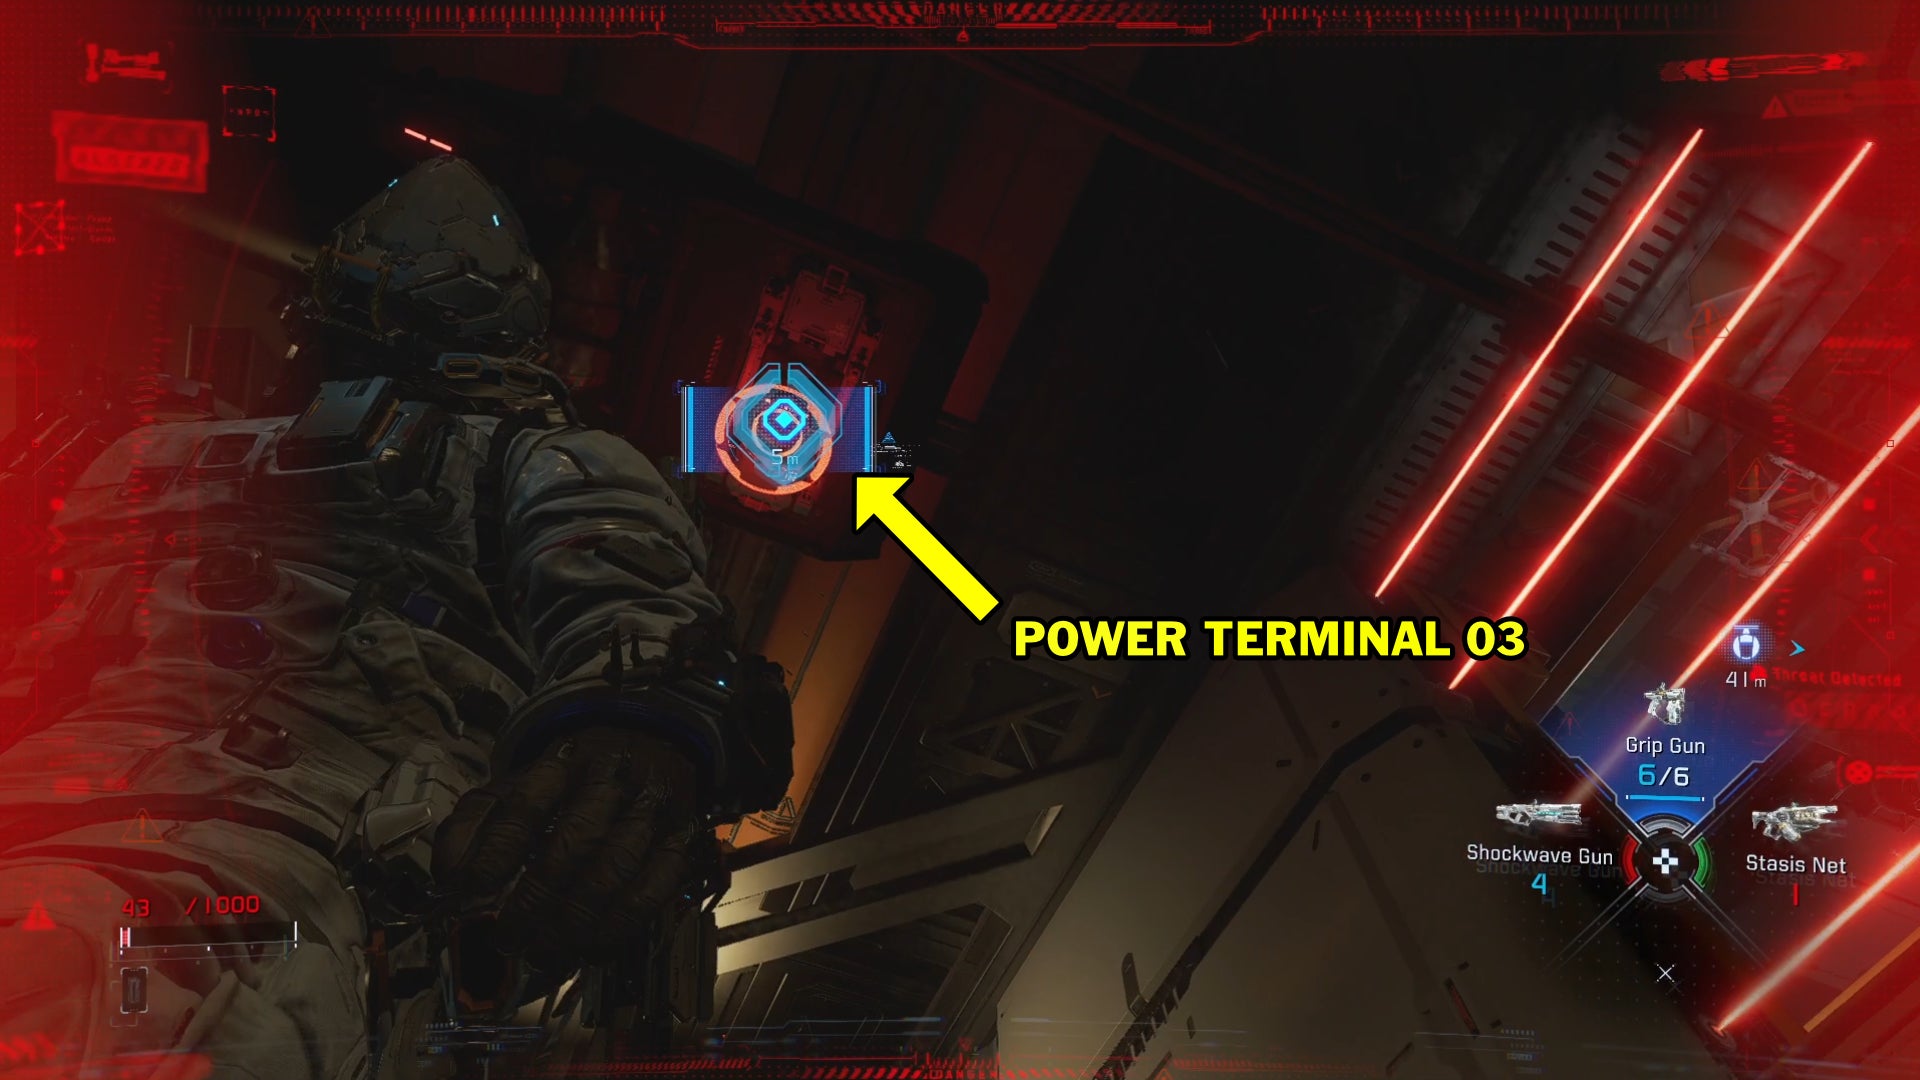
Drop down, grab the Stasis Net and activate the terminal, and then enter the nearby door to retrace your steps to get back up; this leads you into a room that goes into lockdown with another Crusher to contend with. Once the Crusher’s dead, look at the ceiling to find Power Terminal 03. Activate it, and finally, all Power Terminals are locked in!
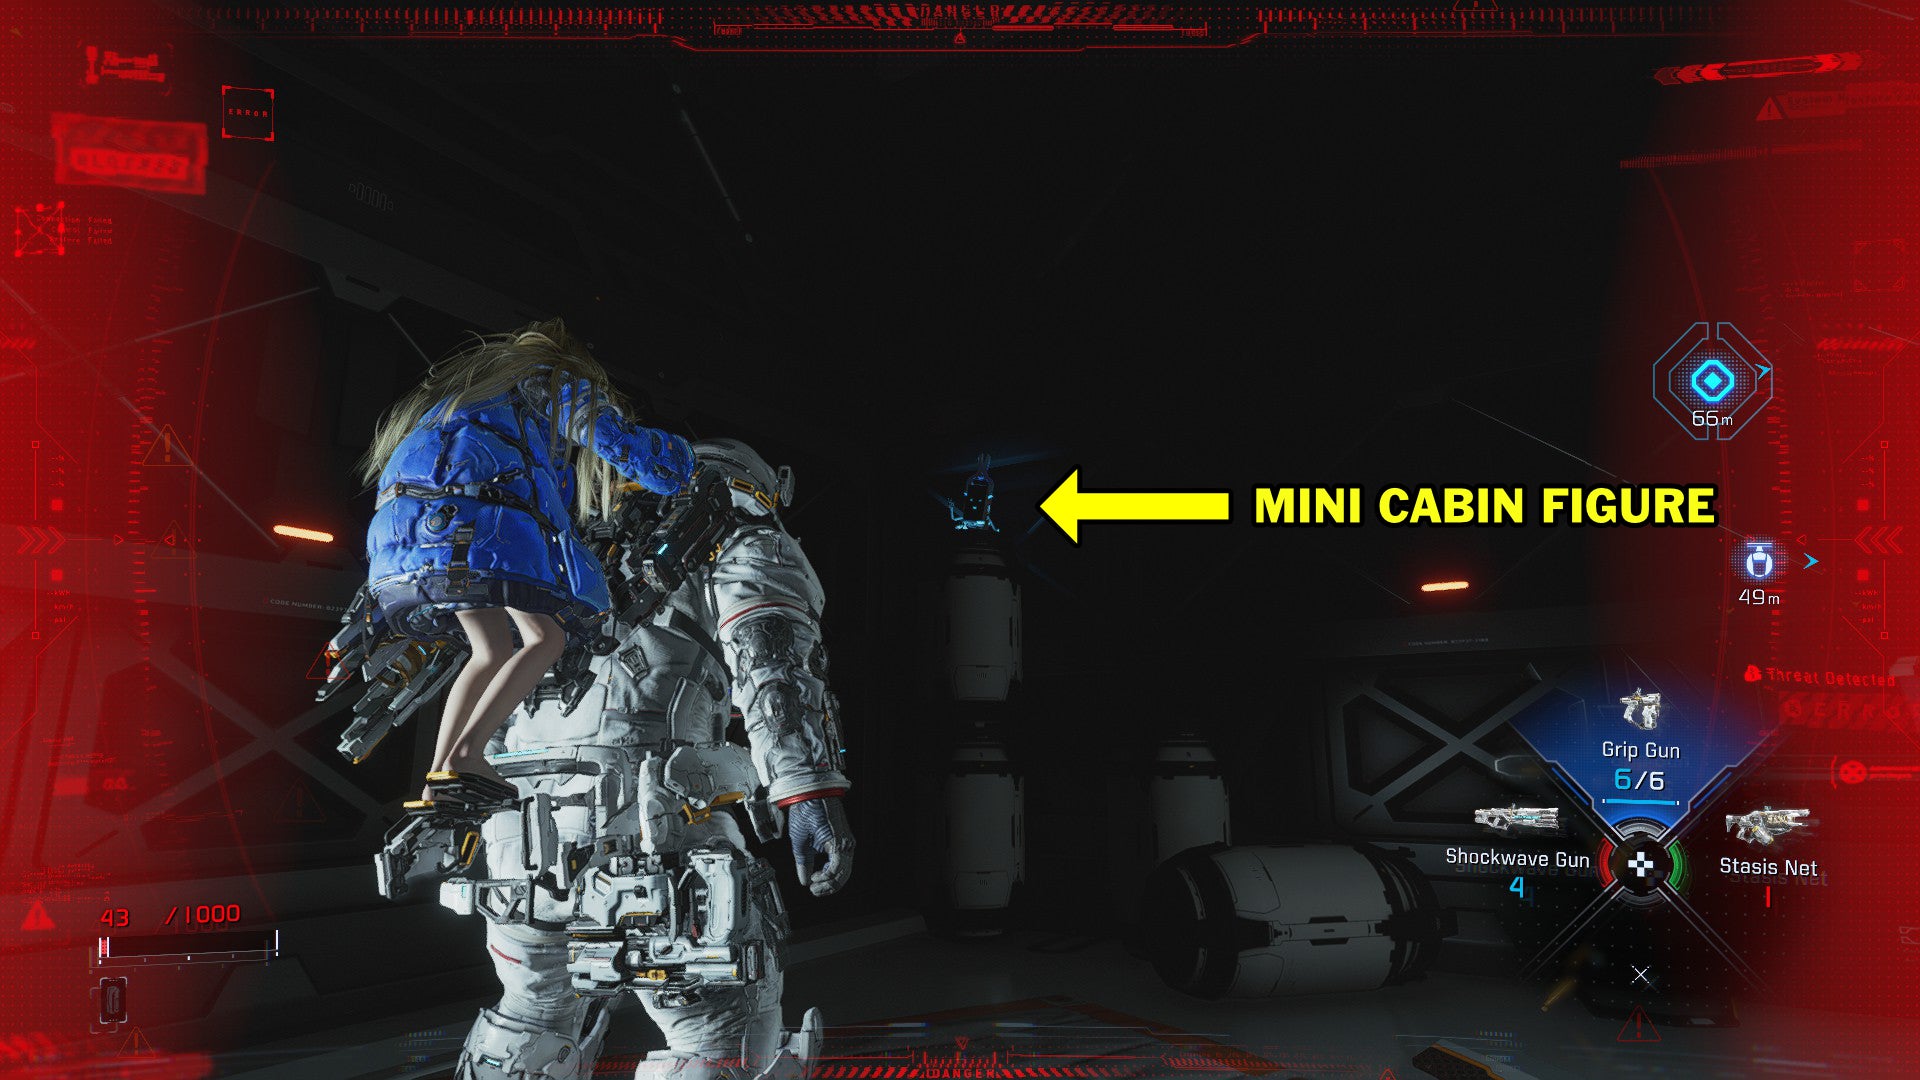
If you leave via the door that opens, you’ll come to a crossroads. The hall ahead of you is blocked off with what looks like a large pile of messed-up Lunafilament wreckage. Ignore it for now (Diana will eventually get an upgrade that lets her bypass these obstacles) and turn to your right. Atop a canister, you’ll see an odd little figure emitting a song. Shoot it to get your very first Mini Cabin Figure.
If you’ve spent time hunting down the collectible Mr. Raccoon bobbleheads in the recent Resident Evil games, you know the deal — these little fellas are hidden throughout levels, and if you manage to find each one, you’ll get supreme bragging rights. If you ever want to see what Mini Cabin Figures you’ve found, you can see them back in the Shelter in a display area near the Firmware Updater and Unit Printer consoles.
Now you’re free to advance onwards. If you’ve forgotten the way to the Power Terminal door, pop open your Scan and retrace your steps to get there. However, before advancing to the next area, it’s worth returning to the upper platform where Power Terminal 02 was and taking a view of the platforms beneath you. From this high vantage point, you can drop down and grab several out-of-the-way Upgrade Components.
Main Control Lobby
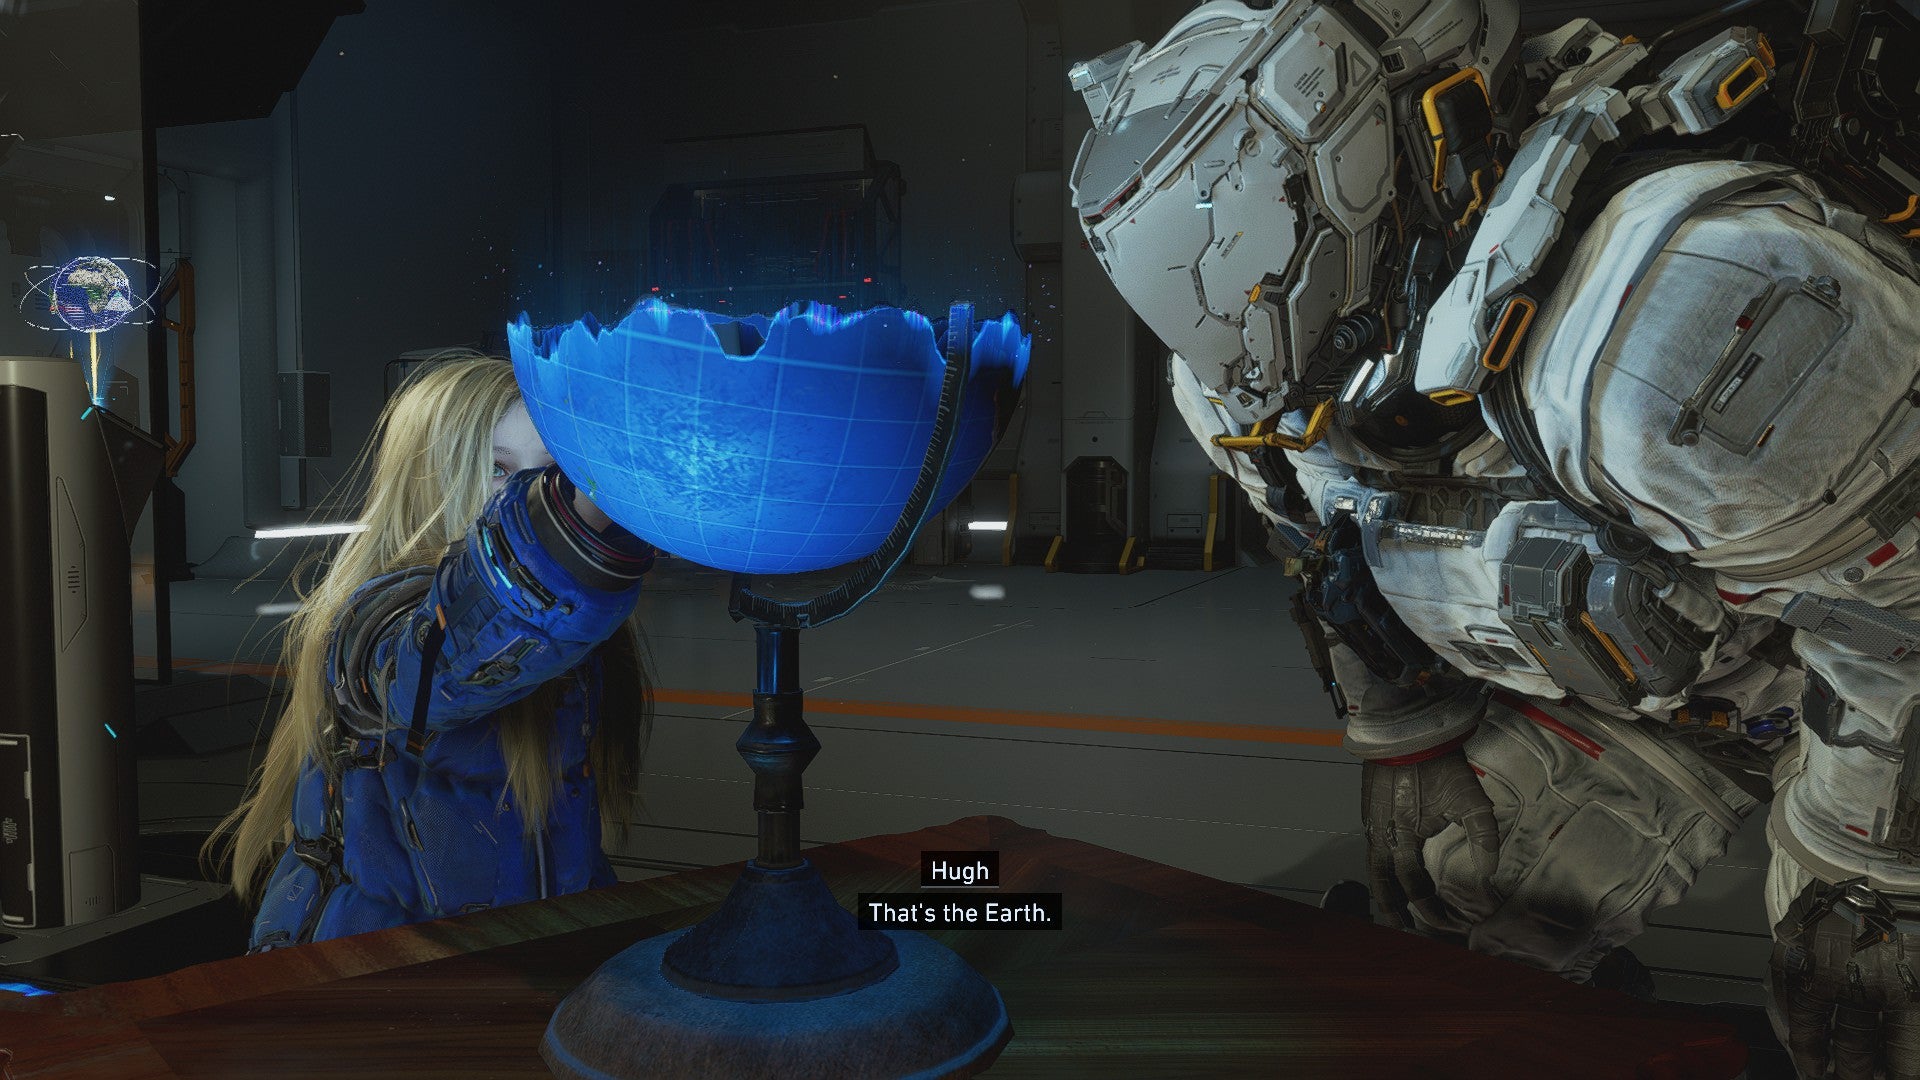
Past the Power Terminal door, another Upgrade Component awaits. Pick it up, then drop down to reach a new area and an office that looks furnished with a lot of old-fashioned Earth stuff. It’s here that you’ll find a Globe of the Earth that Diana will take an interest in. Hugh explains it to her, and you’ve got your first Read Earth Memory, AKA a REM. If you were wondering what the REM Replicator back at the Shelter does, it’s related to these 3D-printed relics of home. Find each REM in the Cradle’s Sectors, and you can print them at the Shelter as presents for Diana to help teach her more about humanity. Cute!
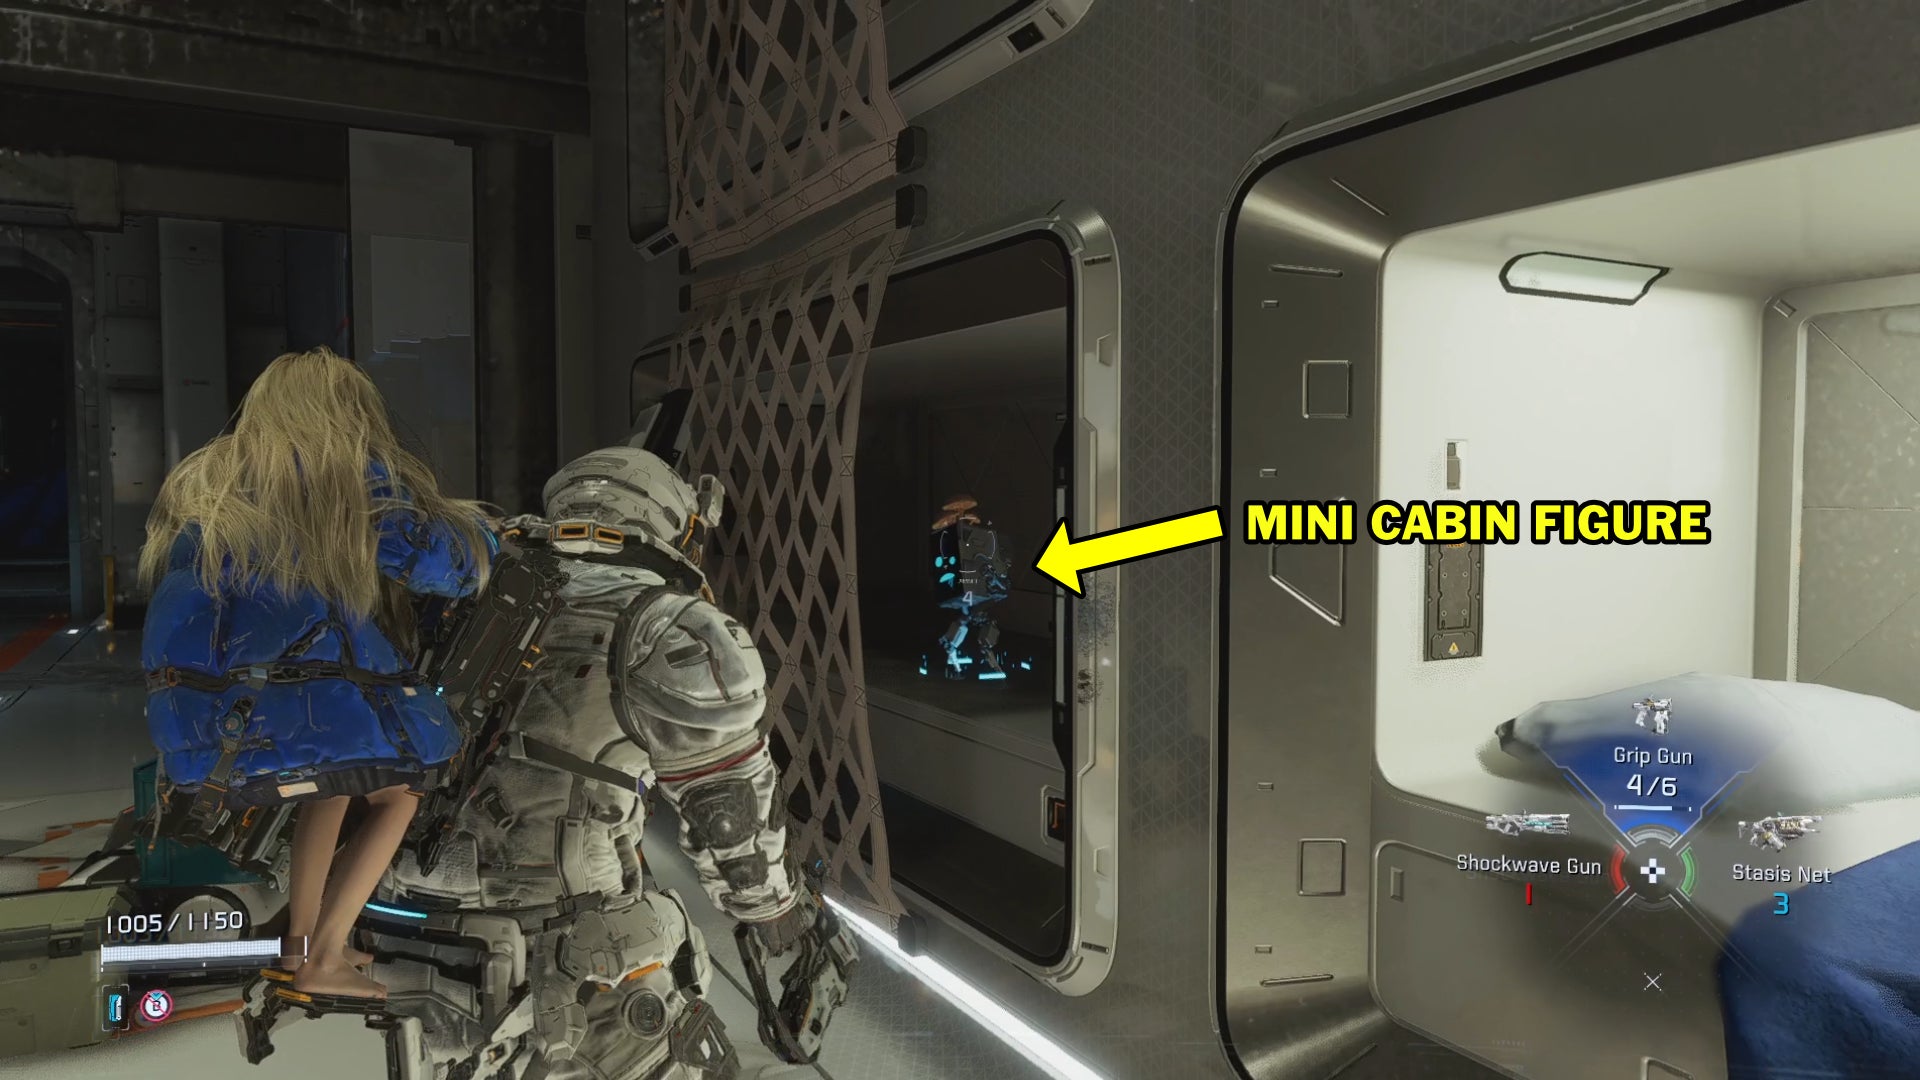
You’ll also find your second Mini Cabin Figure hidden in one of the bed spaces inlaid in the wall — listen carefully and check behind a rope tarp to nab it.
In the next few rooms, there will be a bunch of lab stuff, a computer welcoming visitors to the Solar Power Plant, a hologram of scientists talking about IDUS, another Cartridge Holder, and a blue chest containing the Hardened Suit Mod. As you might suspect, Mods are customisable bits that Hugh can use in his loadout, but only back in the Shelter’s Tram Terminal. Speaking of the Shelter, the Main Control Lobby Station Escape Hatch is next to the blue chest, making this as good a place as any to return to the central hub, because a boss fight is coming up.
When you’re ready, go through the red door marked A2 and keep moving until you’re facing a large central chamber with a console in its middle. Look to your right to find your first Hacking Node. Hacking Nodes make special effects appear on the matrix that emerges when Diana initiates her hacks, and this particular one is called Decode, and temporarily increases the damage dealt to enemies. Obviously, this will come in handy very shortly!
SectorGuard boss fight
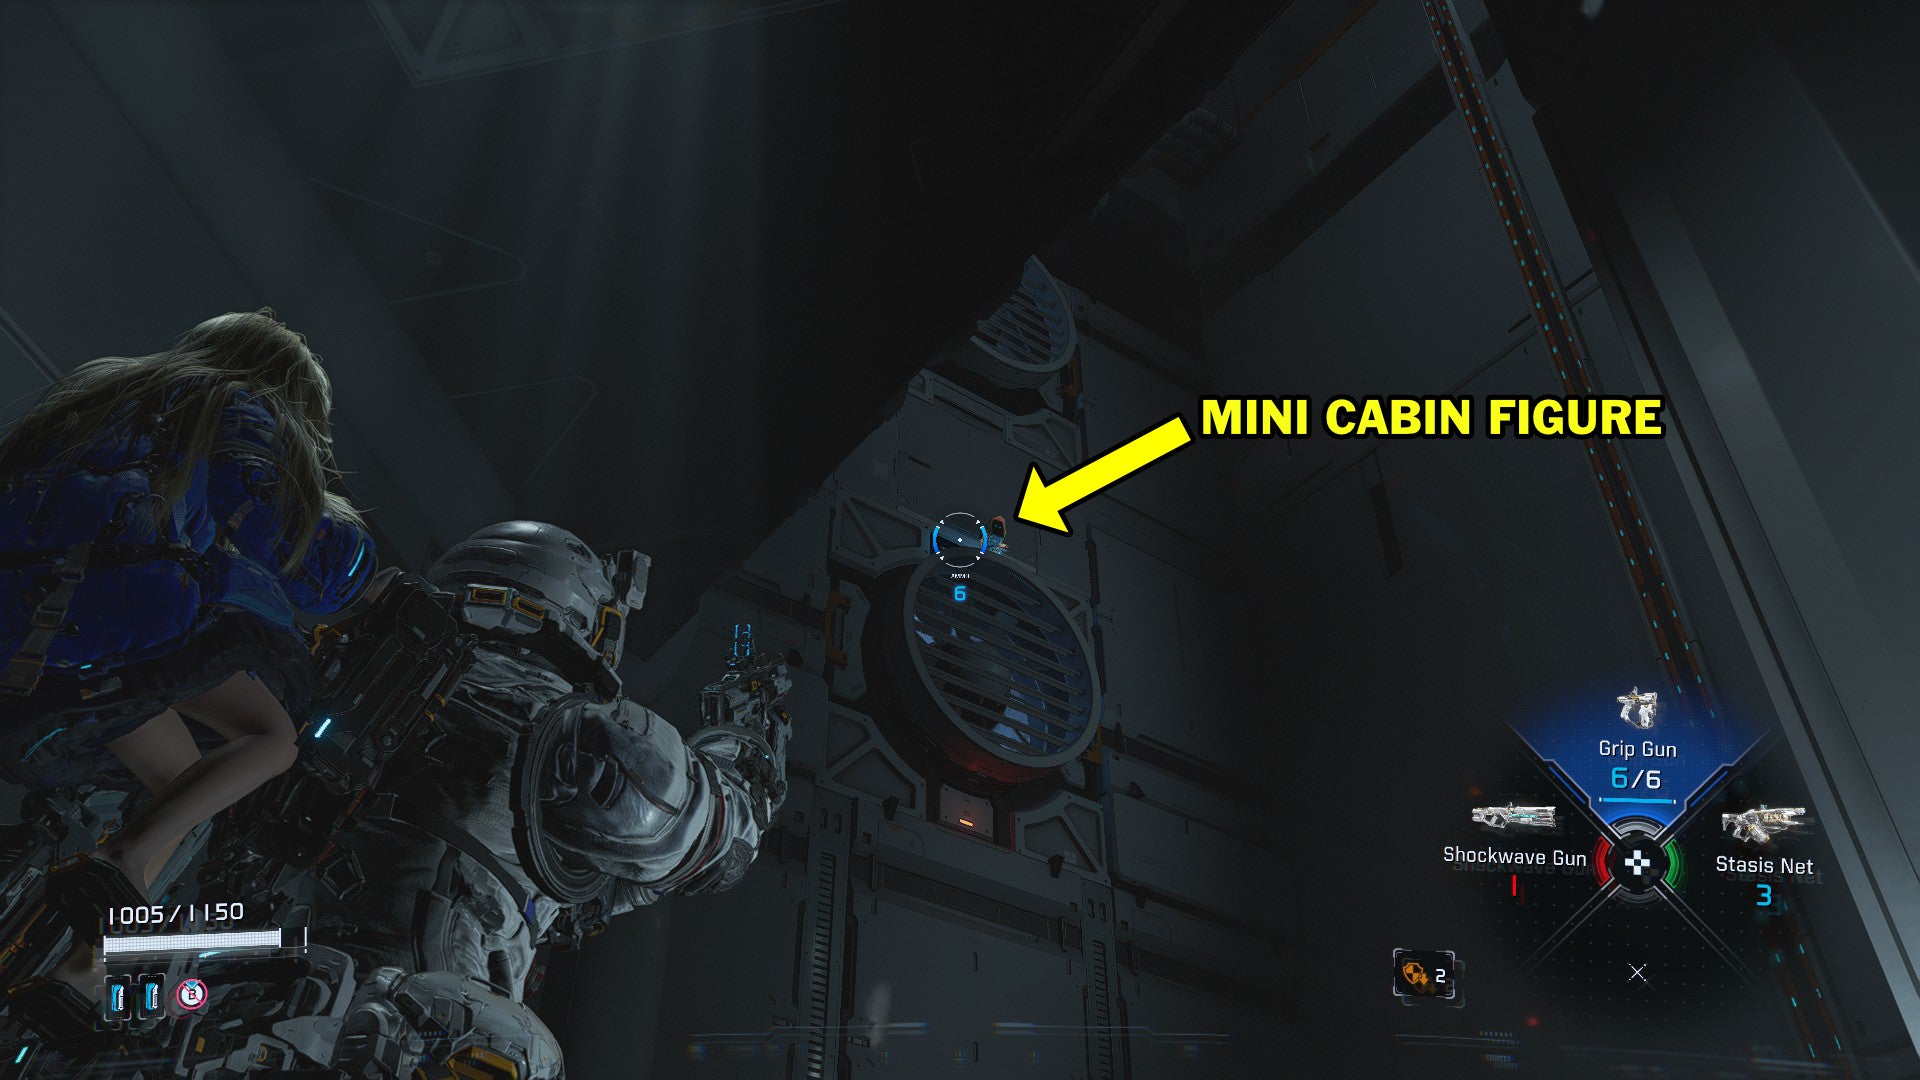
Now it’s time to head towards the room with the boss. As you navigate towards the central chamber, keep an ear out for the song of your third Mini Cabin Figure, which will be located atop a fan vent on the wall. Blast him, head to the central room, and hack the circuits of the main control panel, which activates a lift leading you up.
A whole slew of bots will now appear to wear you down. Take them out and be sure to grab all of the goodies around the room before interacting with the main computer in front of you. A cutscene plays, giving you a glorious view of the Cradle. Unfortunately, IDUS decides to rain on Hugh and Diana’s parade, summoning the SectorGuard boss on them.
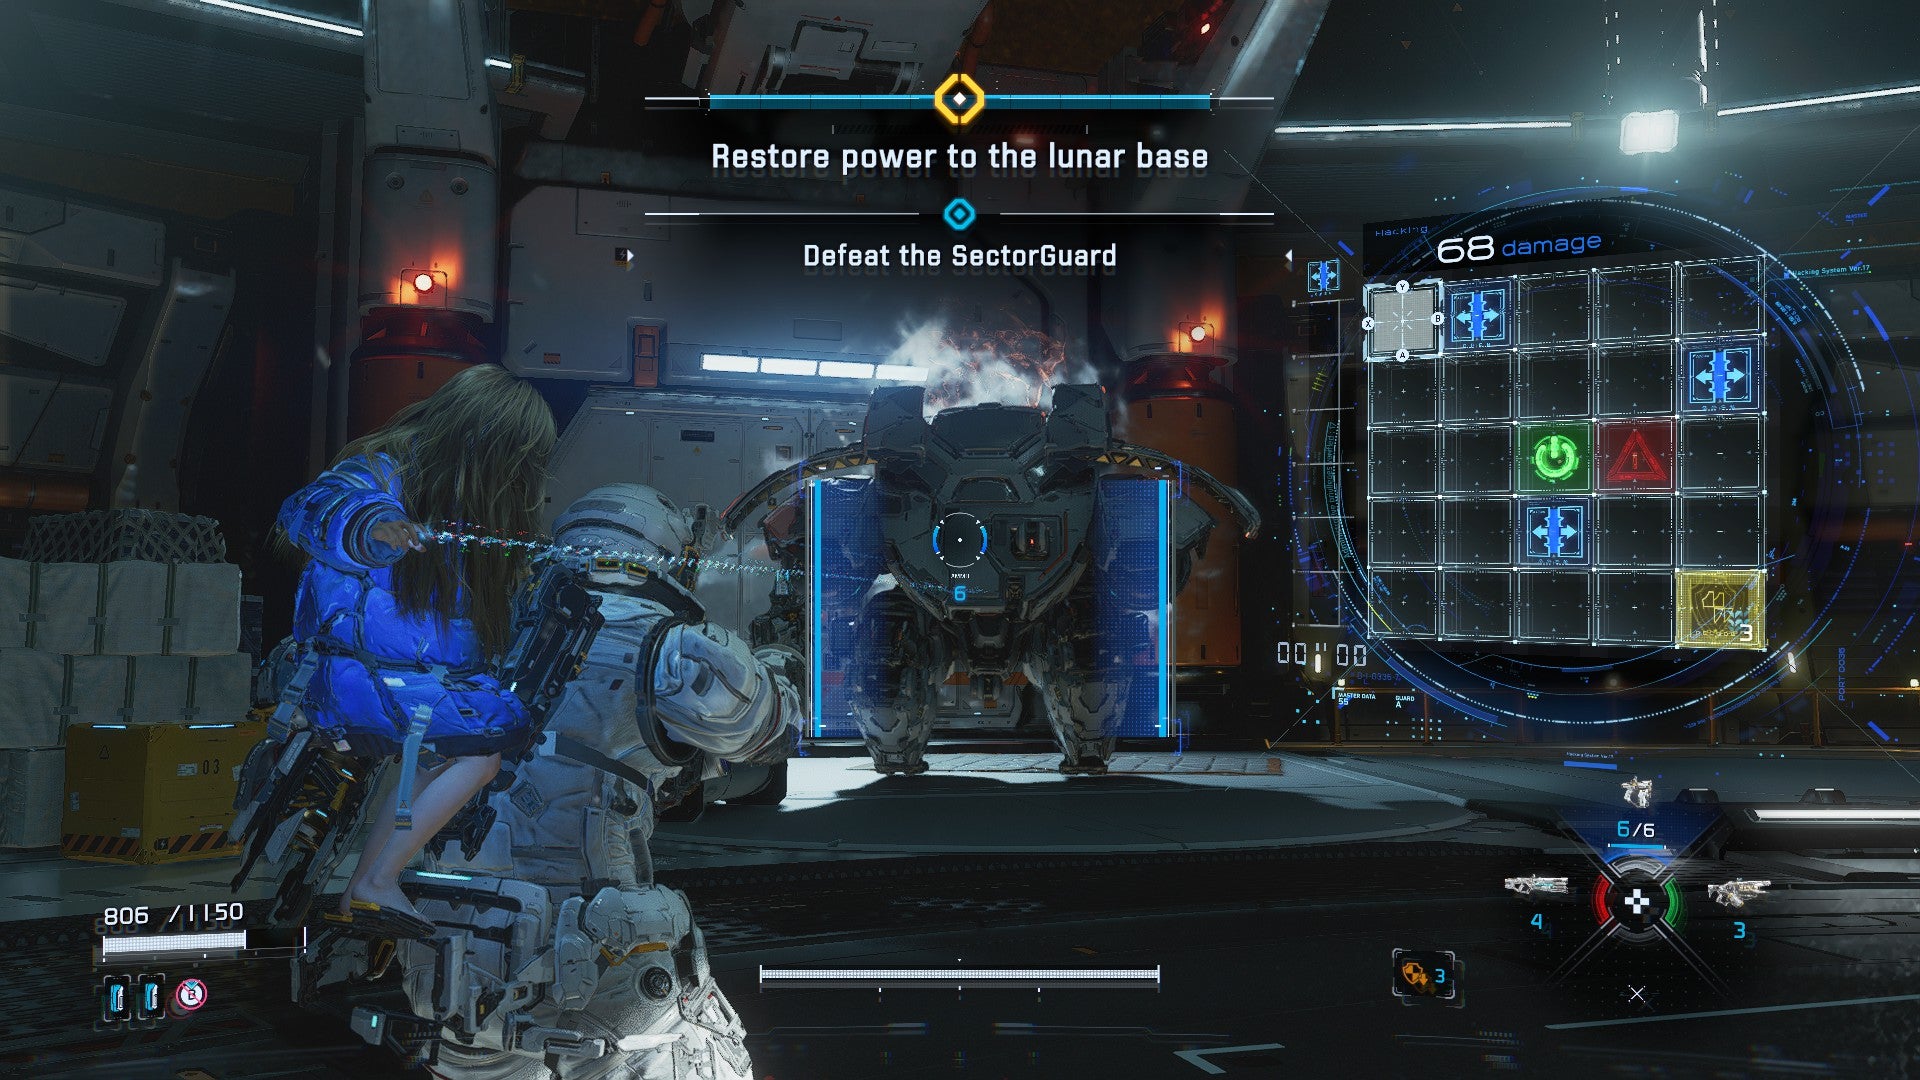
Fighting the SectorGuard is similar to regular bots, but you’ve got to watch out for its charge attack, which Diana will warn you about. The SectorGuard will also fire missiles at you, which are telegraphed by red circles appearing on the ground. (This certainly feels like dodging boss attacks in an MMO, doesn’t it?) You can retaliate by hacking the SectorGuard at every chance you get, avoiding any red spaces on the hacking matrix and being sure to use the new Decode Hacking Node at your disposal. Fire at the tanks on its back for maximum damage, and use Diana’s Overdrive Protocol if it’s available.
About a third through the fight, you’ll get a message about Critical Shot, which lets you unleash a strong follow-up attack against a downed enemy. When this occurs, run close to the SectorGuard, and Hugh will climb atop it and blast away like a badass. (You’ll be able to unlock Critical Shot later in the Shelter via the Upgrade Components console.)
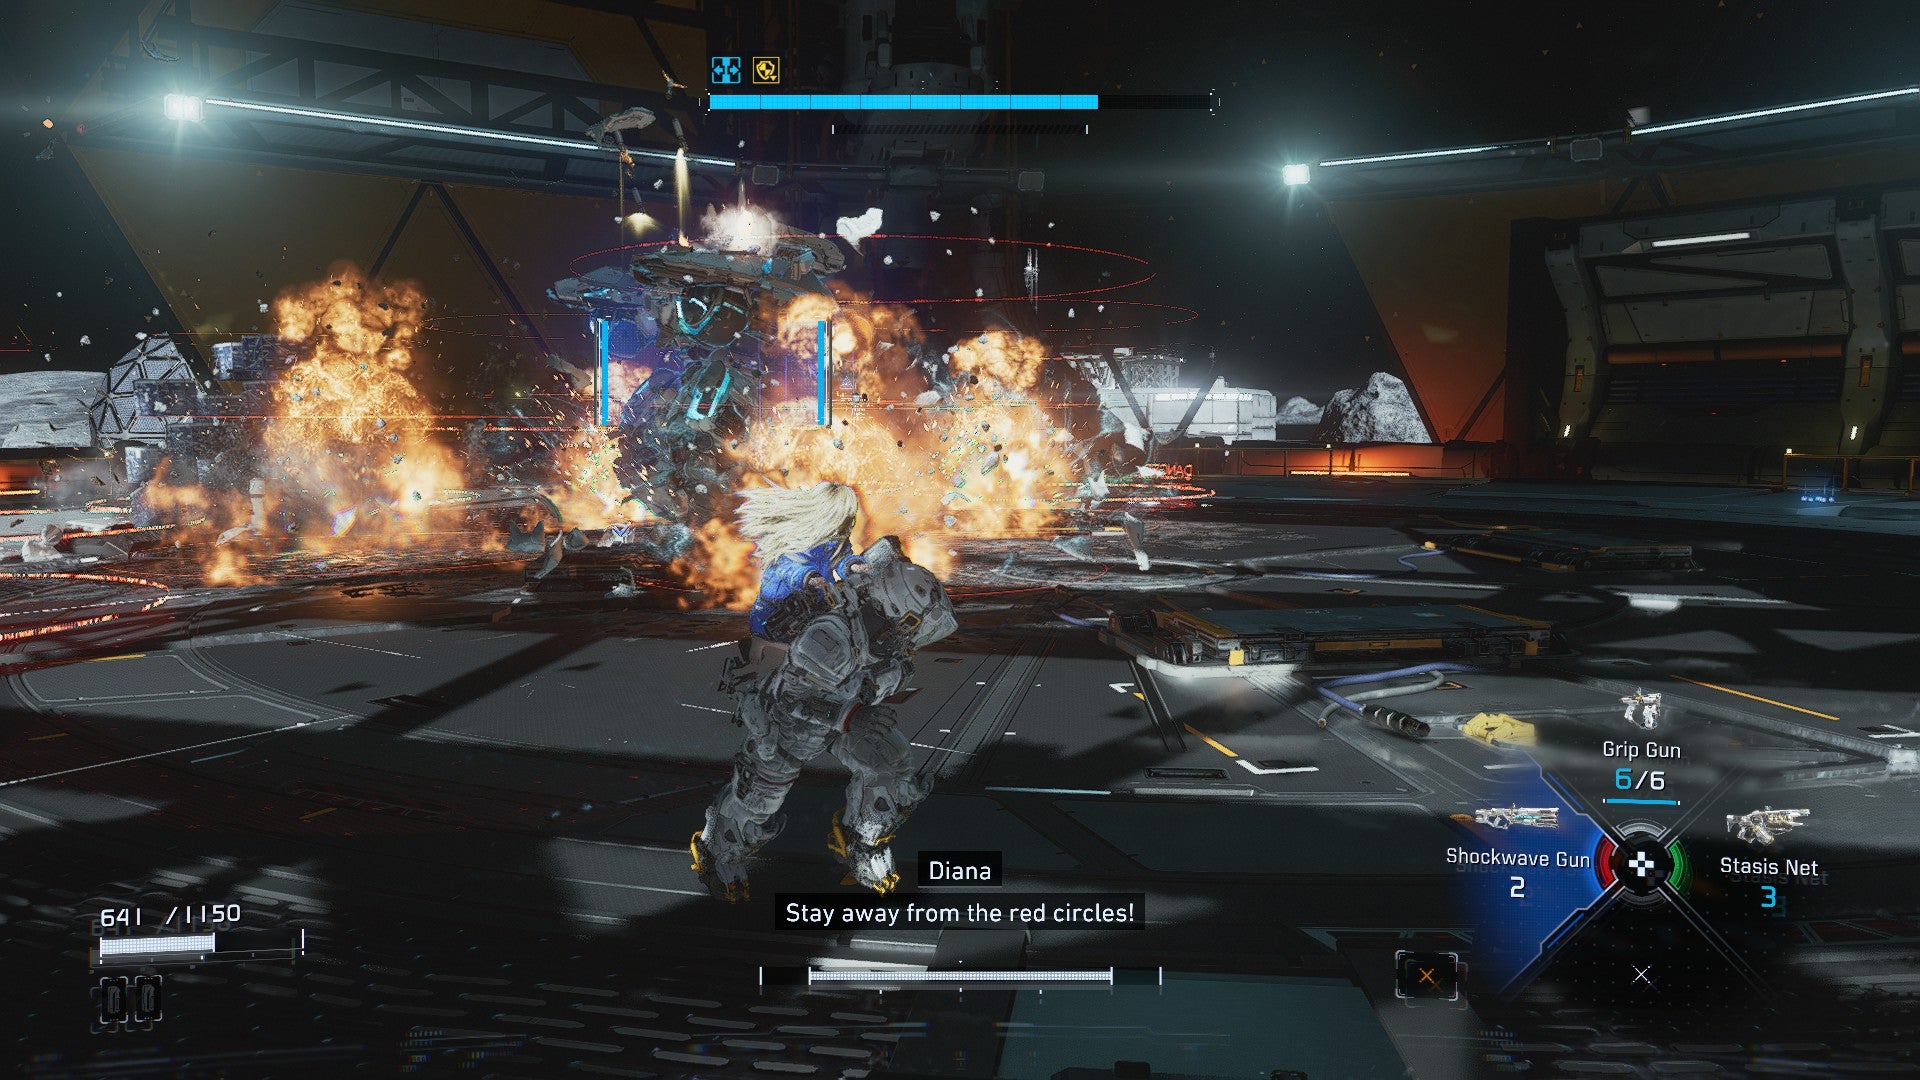
Once the SectorGuard collapses, congrats — you’ve defeated Pragmata’s first boss. Take the Tram back to the Shelter to rest and get ready for the next Sector of the Cradle.
That finishes the first section of our Pragmata walkthrough, detailing Sector 1, the Solar Power Plant. Head back to our Pragmata walkthrough hub to get your bearings before continuing onto the next section of this touching sci-fi adventure. Sector 2, the Mass Production Array, awaits!